Marcelo's amazing house built with railway sleepers in Chile


Looking for ideas on how to build a lake shore house with railway sleepers I got to your website and I got many great ideas on landscaping, walls and and solutions (like using Timberlock screws which I already bought in the US). I live in Chile so I'm buying the railway sleepers from the local railroad and not from you, but I thought you might be interested in the pictures of how the construction is progressing after seeing you are featuring some ideas from the US as well. Thanks a lot for all the great ideas. Not being able to find railway sleeper house tips, your site has been a valuable help to keep me going.
Marcelo Miranda, Santiago, Chile
A house built of Railway Sleepers - Part 1
I recently bought a piece of land by a lake from a friend to build a house. At some point which I quite don't remember I decided it was going to be built using Railway Sleepers. This is the first of a series of blog entries to document the progress of the construction to share with family and friends, and also to force me to complete the project properly, as I believe public humiliation to be one of the best incentives.

The lake in case you want to know is Rapel in Chile, a 40 km long artificial lake created by a hydroelectric dam in 1968, and my house will be in the upper left corner. I don't know what is it with me and railways, but I've been collecting railway nails since I was a kid (with no objective in particular) and I've have a thing or two made of railway sleepers: a big TV table, and the base of a log-slice centre table I built with a huge log slice given by a friend, and a railway sleeper found in the Chilean desert. more background detail, I love to work in wood and have done some fairly large projects (like a garage/workshop with a gambrel roof for my bikes), so I decided early on the process that I would build the house myself from plans to finish, with the help of a very skilled local handyman (Don Hernán who is truly precise in his work) that handles the heavy tasks and advances during my weekend visits.
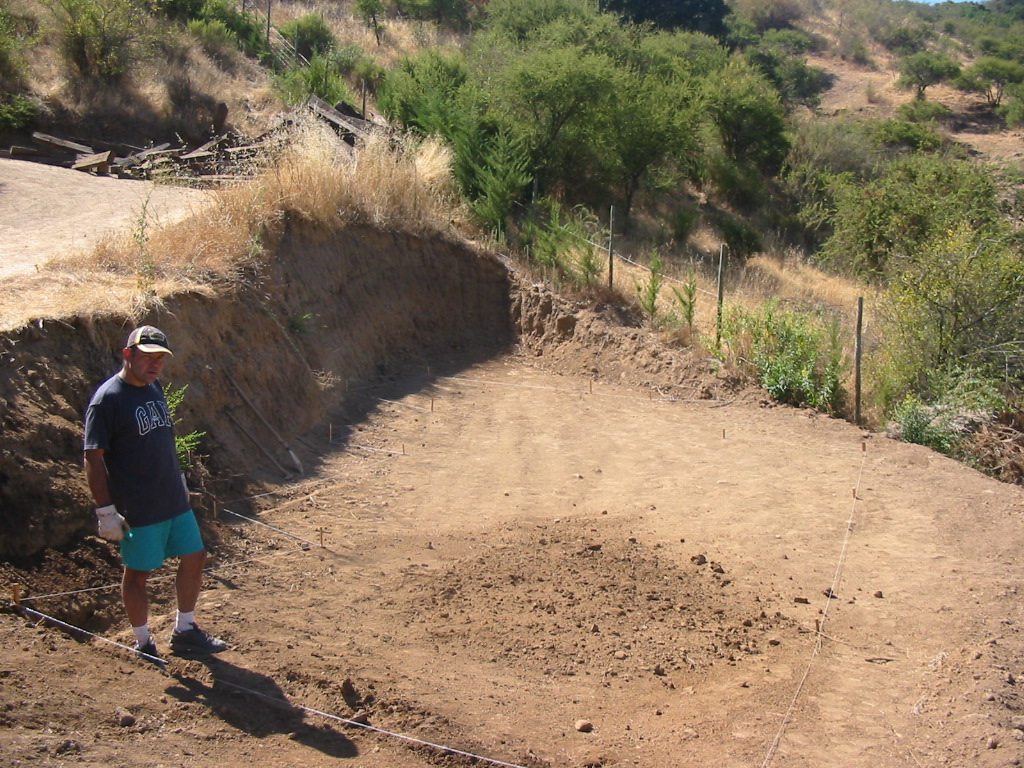
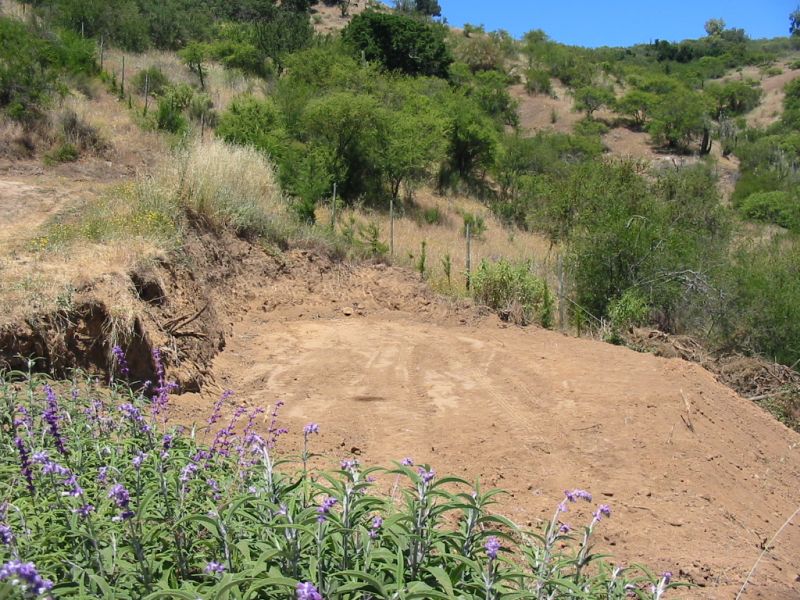
Step 1 - Find the ideal spot. This was an easy one, as we had decided we wanted something close to the shore, the ideal spot is just 3 meters from the shore. Once that was decided we hired a local guy (Don Rubén, to give him credit) to level the terrain using excavation equipment. As the land already had the access road built, once the place was levelled and compacted it was ready.
Step 2 - Draw the Plans. If you plan to do anything like this, Googling some pictures or log house plans from the various sites that offer them is a good idea. You could buy plans or hire an architect also, I decided to draw my own plans. The site http://www.railwaysleepers.com also has a lot of good project ideas and tips (like how to fasten two sleepers together), but no houses, yet! To make sure the plans actually matched the terrain I did it the other way around, I laid the outline of the house on the levelled spot with stakes and string (I already had an idea where I wanted the kitchen, living room and dormitories based on the best possible lake view and septic tank position) and then measured everything up and transcribed it to 1:20 scale plans. I drew a fully detailed plant and an elevation in one day. Then I had to go back and do some corrections on the field to correct some not so right angles and stuff like that. I had already decided I would use railway sleepers at this stage, as I said earlier I don't remember when, but my wife Carolina reminds me that we were looking at railway sleepers at railway stations in the south a year before we got the land (again for no particular use) so It's probably something that was on the back of my mind for a little while.
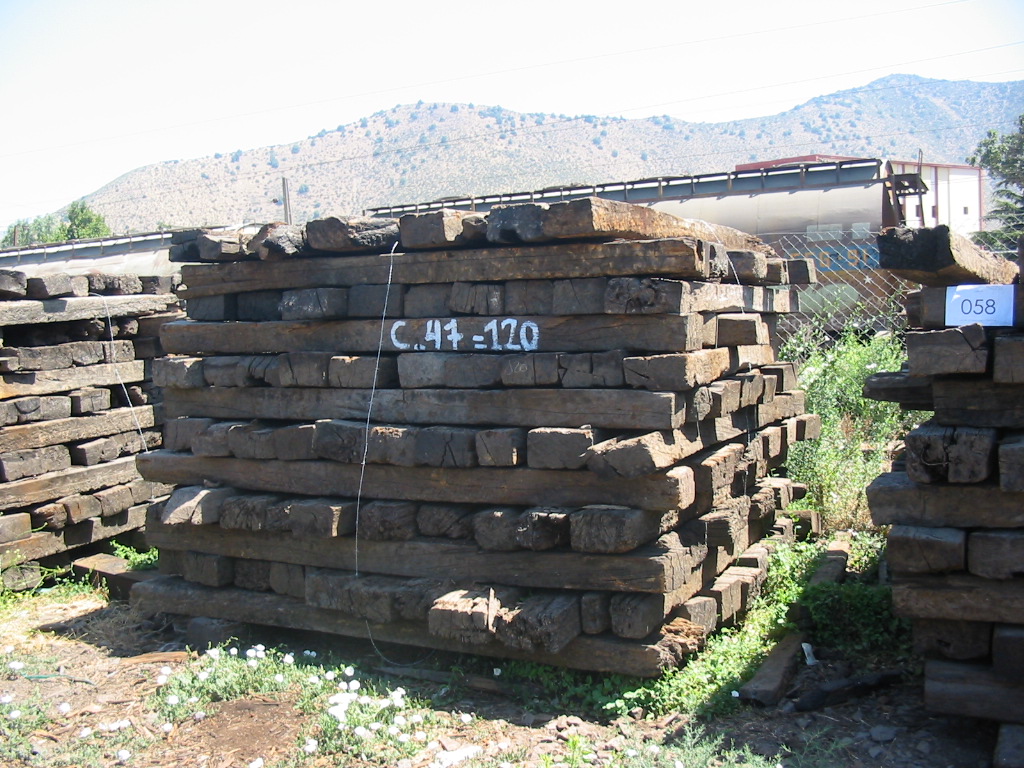
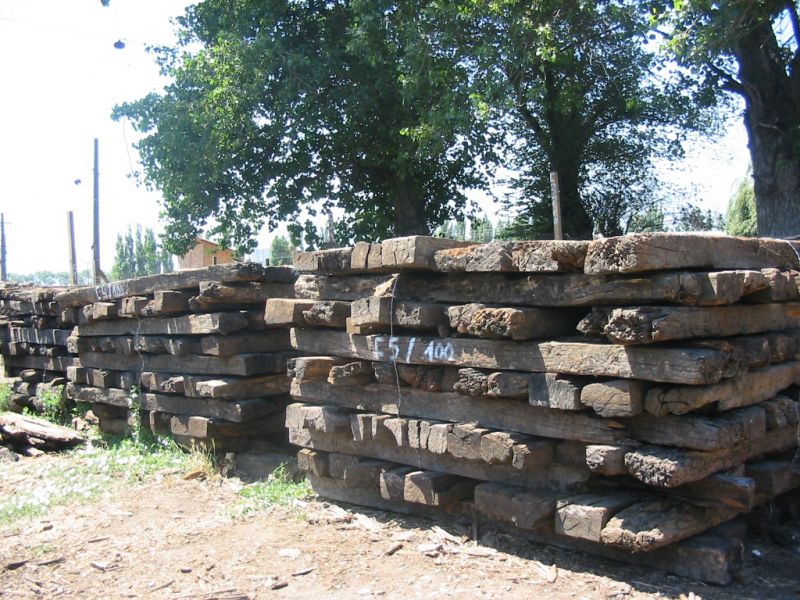
Step 3 - Get the Sleepers. I found a guy offering 100 reclaimed railway sleepers for a very reasonable price at a local auction website, but I never got him to actually make the sell. Later I discovered that he didn't really had them, he just had the picture and the railway sleepers were still property of the national railroad. So I waited for a while and called the railroad old active sales office and got the same price. I had to check them out and tell how many I wanted. I took a Friday off work and rode with a digital camera on my Buell Thunderbolt motorcycle on a sunny day to look at them at an old railway station 100 km north from where I live. I took a bunch of photos and decided on which of the towers was best (there where ones with substantial damage done on the removal process), and you couldn't choose the railway sleepers one by one, the deal was by tower (or castle as they called them, but they don't really resemble a castle, do they?!
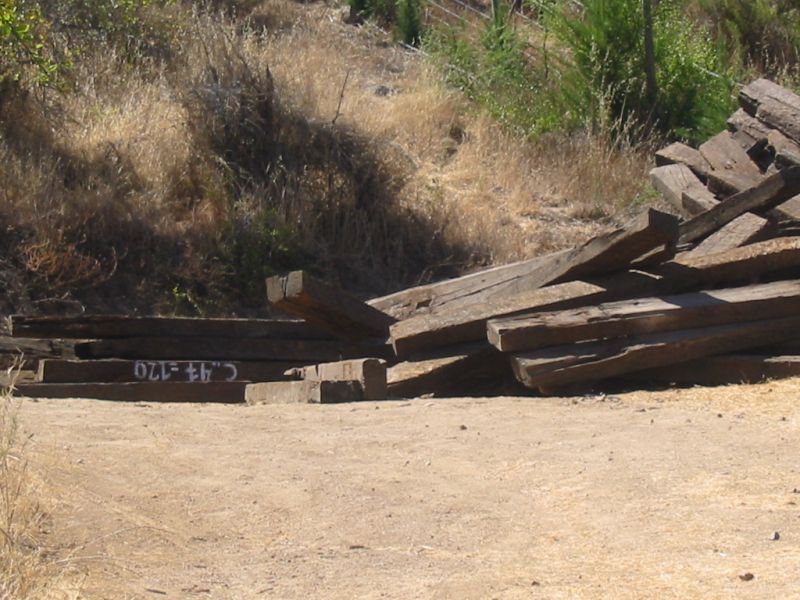
Step 4 - Move the Sleepers. A week later I went and purchased a 120 sleeper tower (my plans called for 100 sleepers but I allowed for 20% damage or landscaping uses). I had to take another day off and go with Toño the trucker to pick up the sleepers and carry them to my land on the lake, a 220 km drive that with the truck loaded took 5 long hours (uphill at 15 km/h... can you believe it!), but it was fun anyway, except for the greasy grilled chicken and fries (the house special - read only choice) we had with Toño and his quiet buddy for lunch at a truck stop on the road. After that I felt like I needed an oil change! An average 2.75 mt railway sleeper weights about 70 Kg so we were moving 8.5 tons of oak. We loaded the truck with help from a fork lift driven by a railway sleeper-loading-experienced guy (trust me this is important when moving pieces of timber that will crush your hands if not handled properly), but moving them and arranging them on the truck was very tiring anyway. Unloading was supposed to be easier since we were using a dump truck, but the things hang to the truck like sticky monkeys, they were so nicely inter weaved that we had to remove them in small bunches using levers. We finished unloading at dawn, and there I sat at night... with a silly grin on my dirty face and a drink in my hand, looking at a mountain of second hand wood in the same way a pirate looks at his newly found treasure! One word of caution, if you are using 120 pieces of heavy timber to build a house, don't unload them on the construction site, or you will have to move them to actually build something (I wasn't this stupid of course...) or on the access road (Yes... I was this stupid). Plan ahead on a large spot to dump them. Next: The construction begins!
A house of Railway Sleepers - Part 2 - The construction begins!
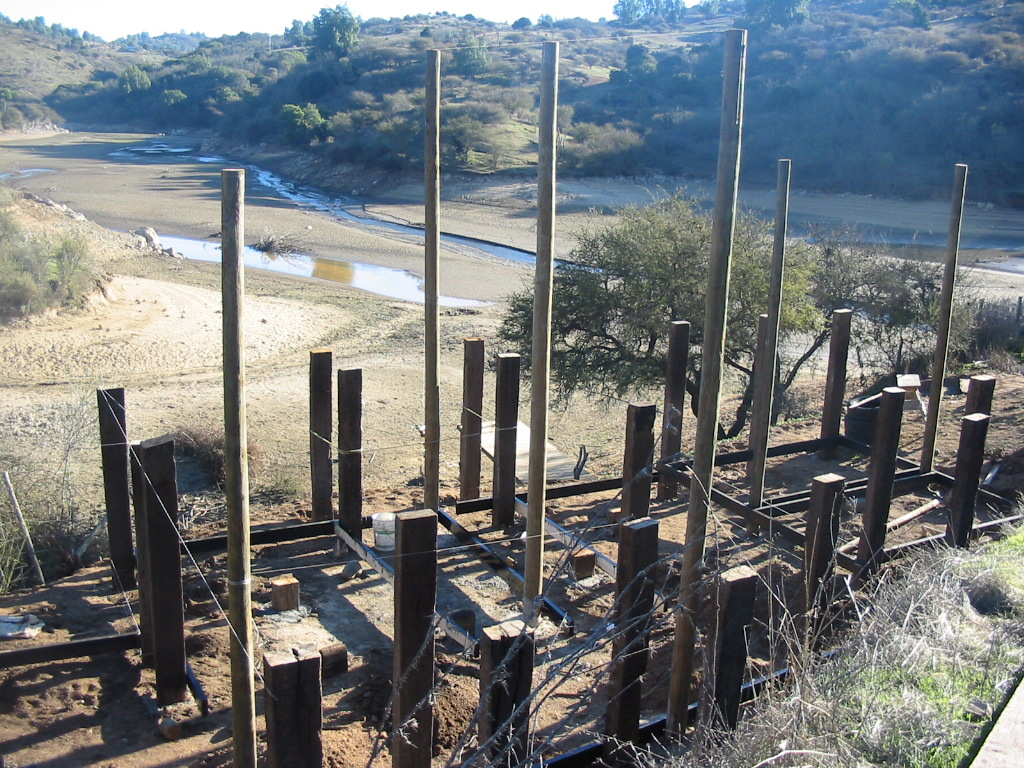
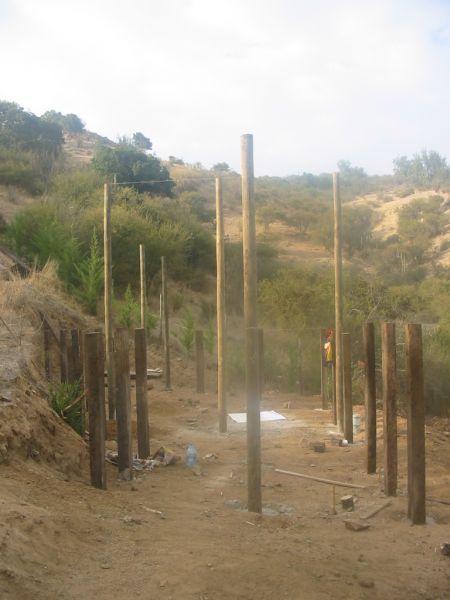
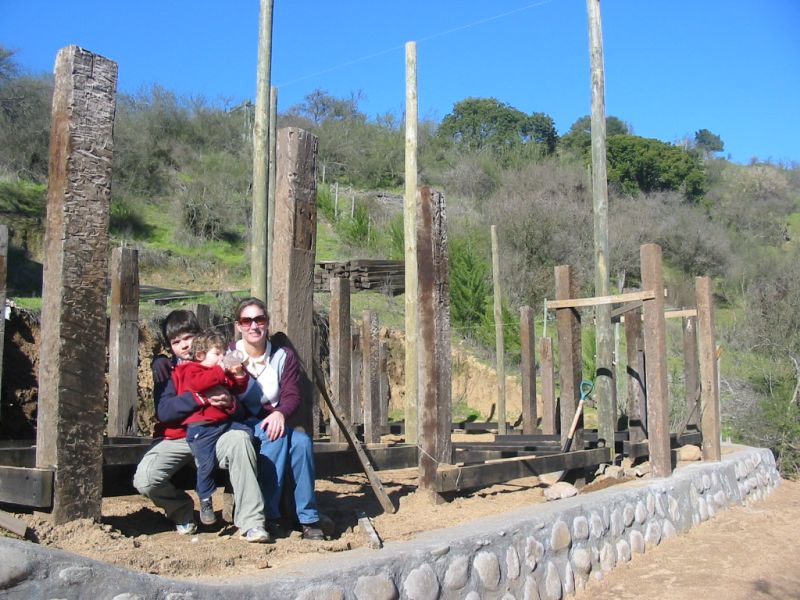
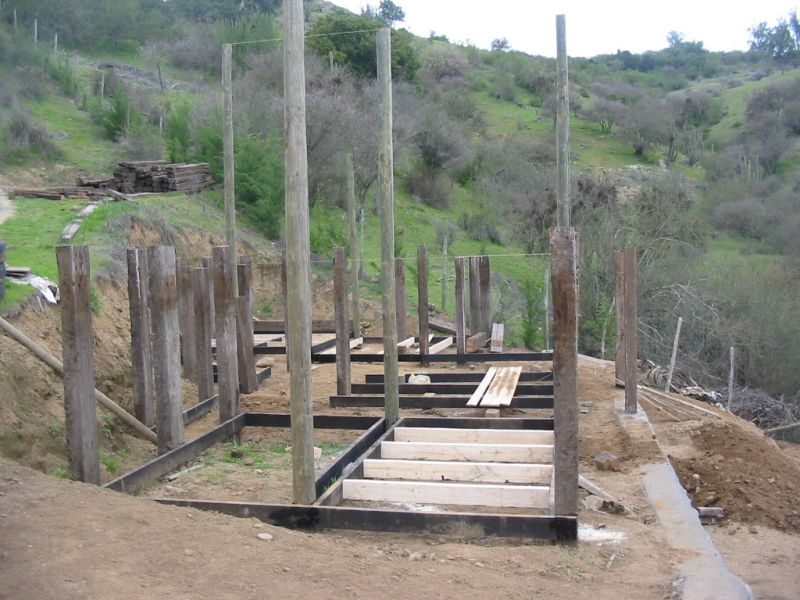
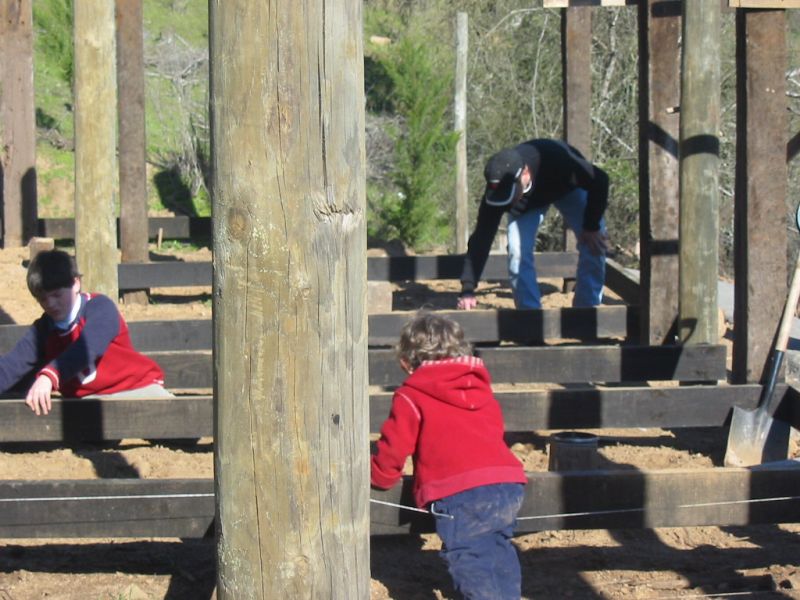
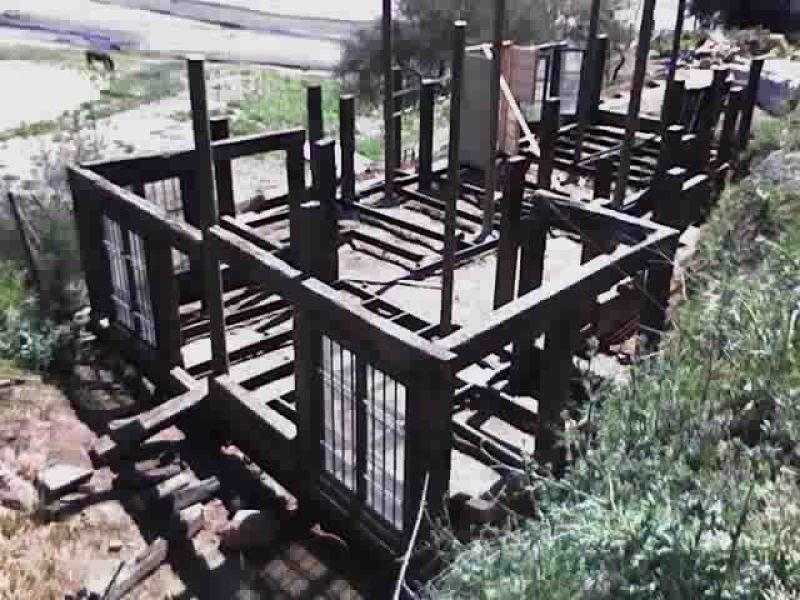
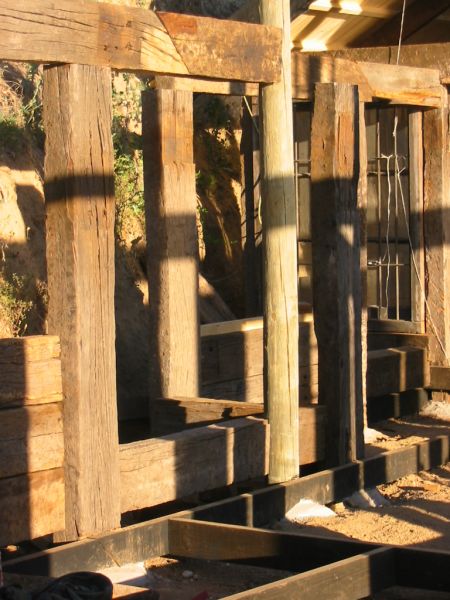
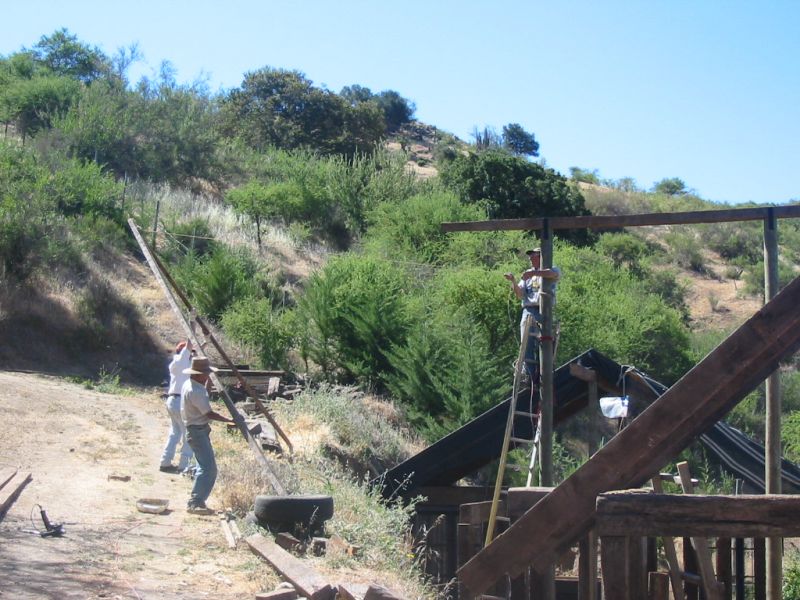
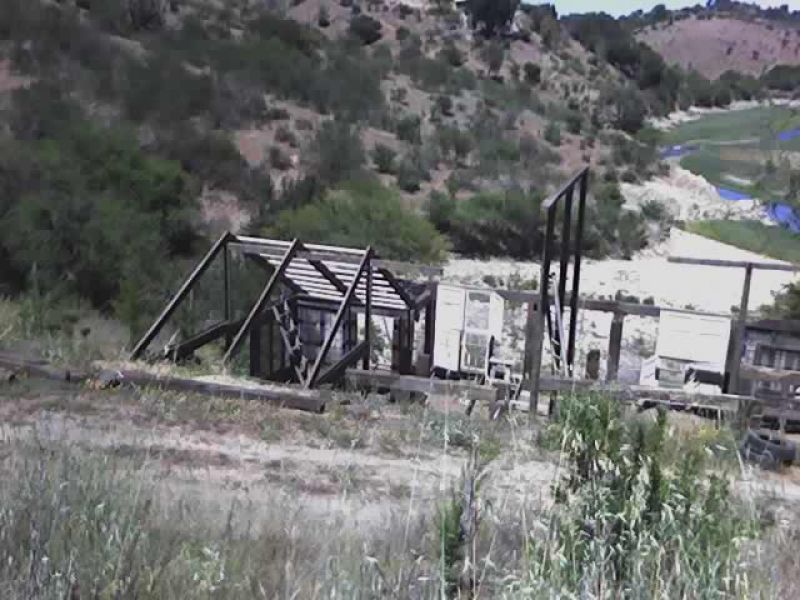
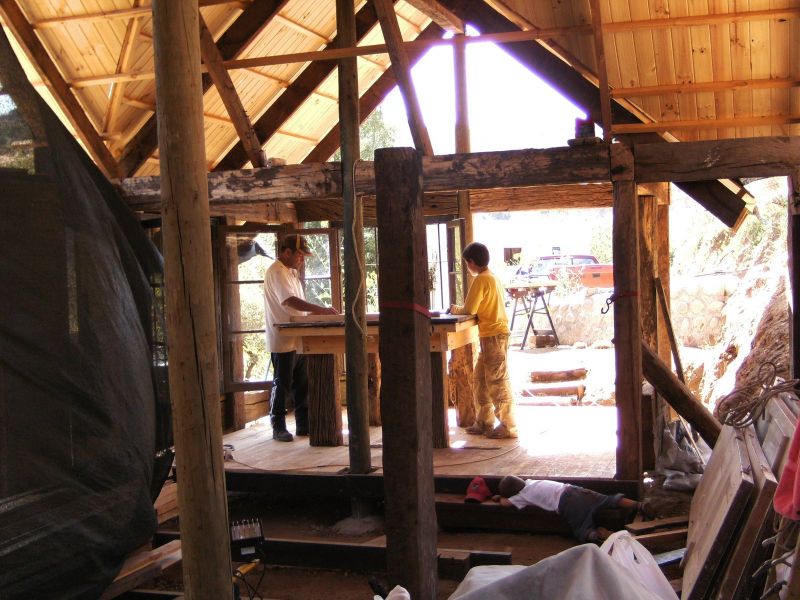
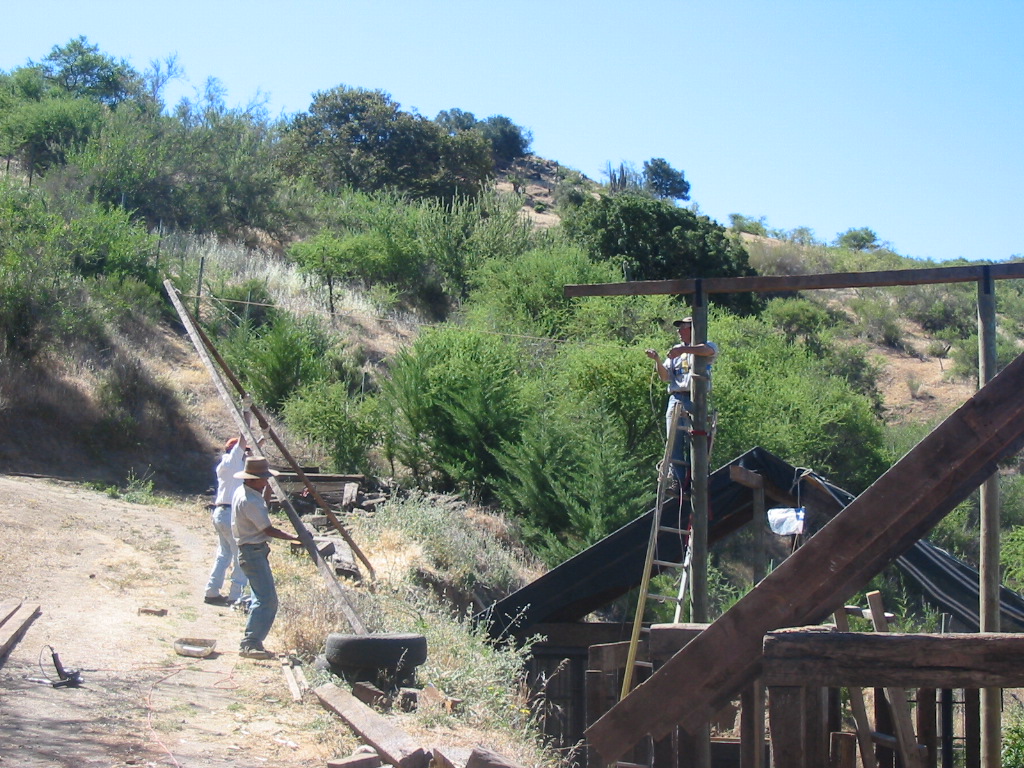
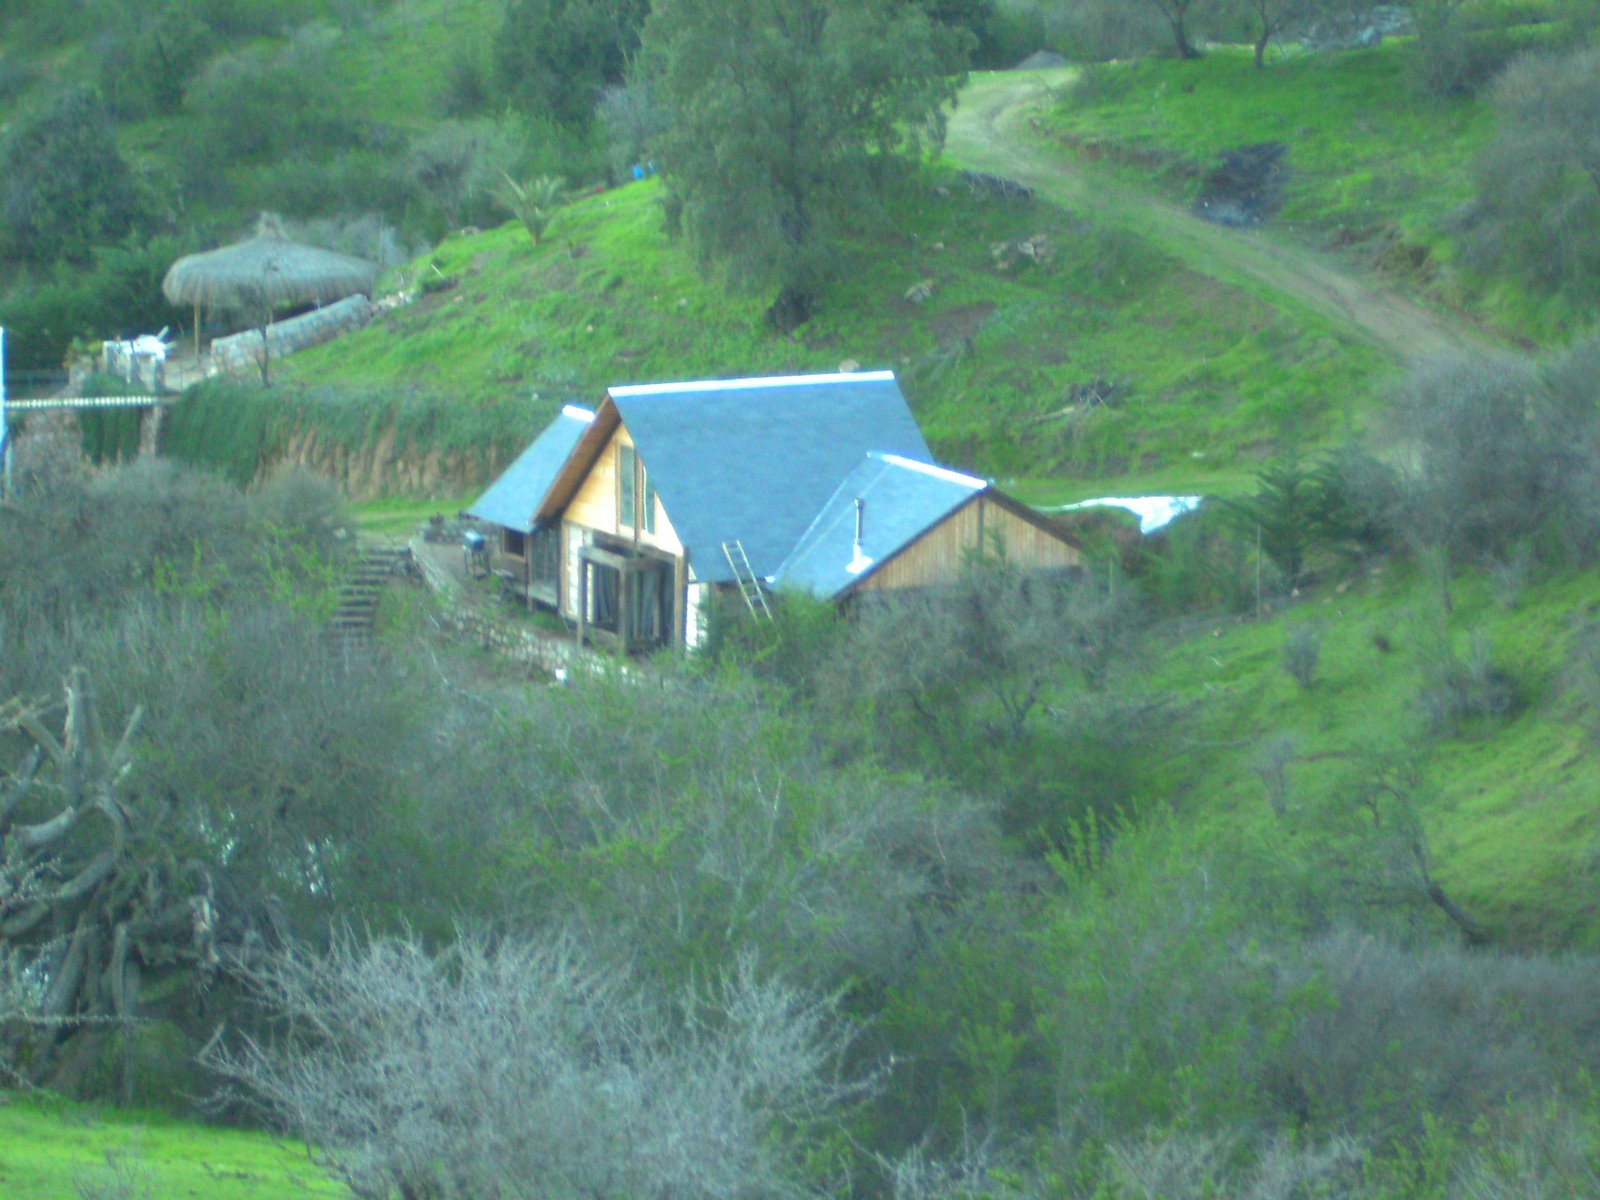
This is the 2nd article in a series that documents the building the construction of a lakeshore house made of railway sleepers. In Part 1 I explained the how's and why's of sleepers and the logistics of getting the sleepers to the construction site. As I said in the previous article I had the plans drawn after the terrain was levelled. So now was the time to dig the holes for the house pillars. We decided to stay away from the border (even though I compressed the ground with two different sized Jeeps... I suspected this non-certified method may have left some loose spots). So we left about 5 feet of margin (1.5 meter) to the border Pillars and Floor Beams. So then we dug the 23 2x2x2 ft holes (and by we I mean Don Hernan) that were needed to plant the pillars. A truckload of sand, another one of gravel and about 400 Kgs. of concrete were used to build the pillars foundations. The centre pillars had to be a lot taller to accommodate for an attic at the centre of the roof, so I bought 7 timber pieces (copper sulphate treated eucalyptus) of 17 and 21 ft. (5 and 6.5 meters). You can see the resulting shape from up close and from a distance in the photos. The first time I saw it done and could guess the house's shape I laid down on the ground and looked at all the pillars pointing towards the sky... the coarse railway sleepers made it look like my very own Stonehenge. (yeah, yeah... I know... but this sort of Kodak moments of pride happen when you see your house being slowly built, even more if you build parts of it... trust me).
Then it was time to put on the floor structure... we used 21 pieces of 2"x4" pine wood treated with a protective paint as floor beams, and bolt them on to the railway sleeper /pillars using 6" hex headed galvanized screws. (Tip: Bolt them slowly or you'll cut the head of the screw in the last inch). My wife Carolina and my son Pablito bolted most of the floor structure, and we all painted them to protect them from moist. By that time I figured that some of the floor would bounce when we walk on the centre areas, so in each room we added a centre piece of concrete as a support point to make the beams light smaller, now every beam has no more than 3 or 4 ft of light between pillars and support points. Now you can jump on a single beams and nothing moves (another scientific method, this one I picked up from my father, who usually jumps over or hangs from anything he is installing, never mind it's just a screw to hold a picture!)
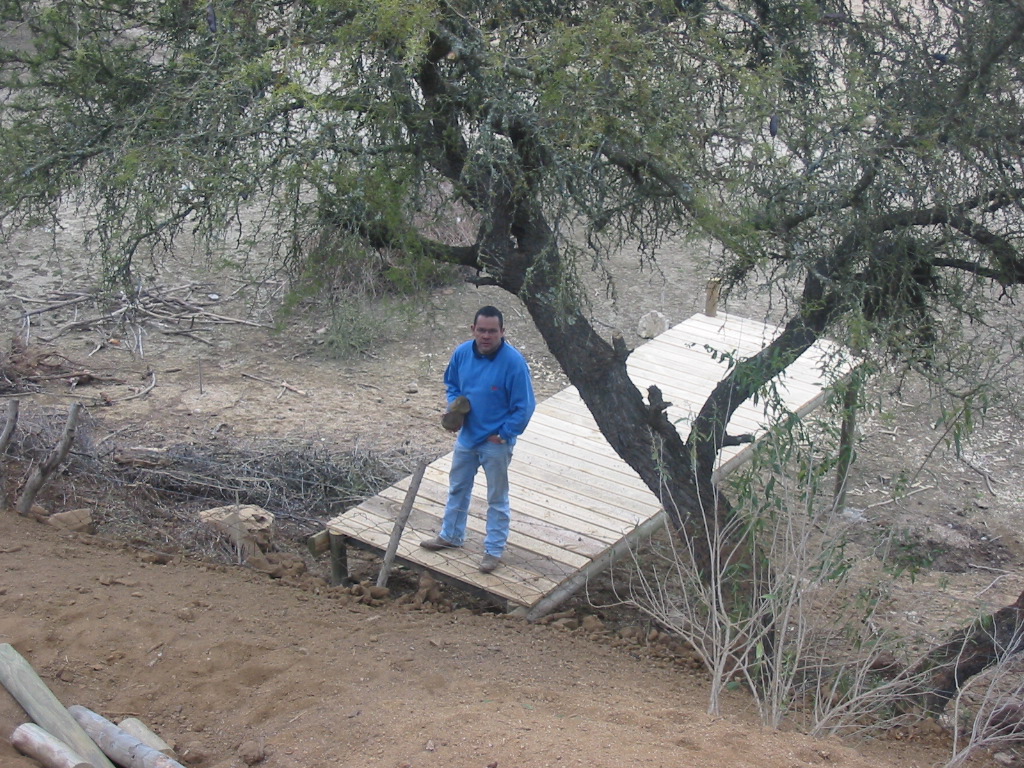
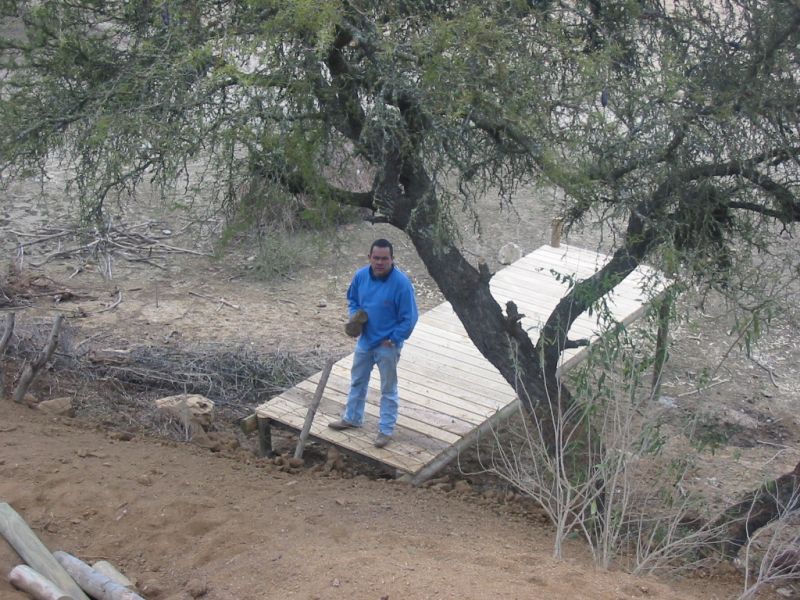
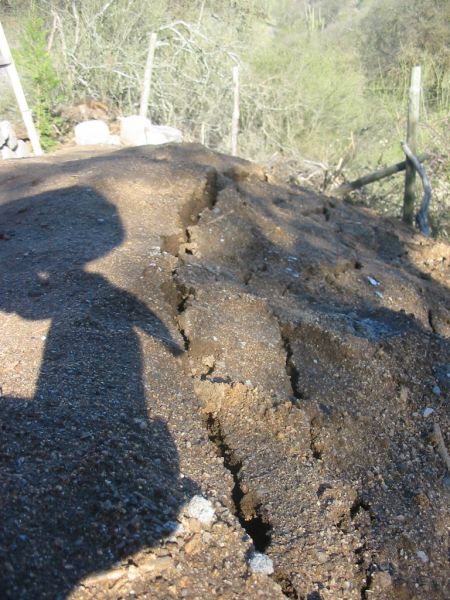
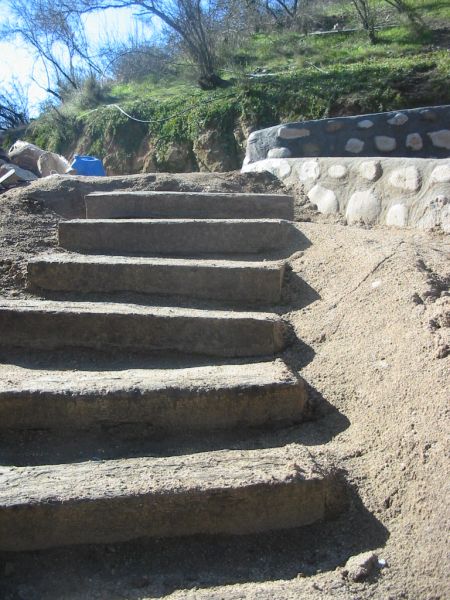
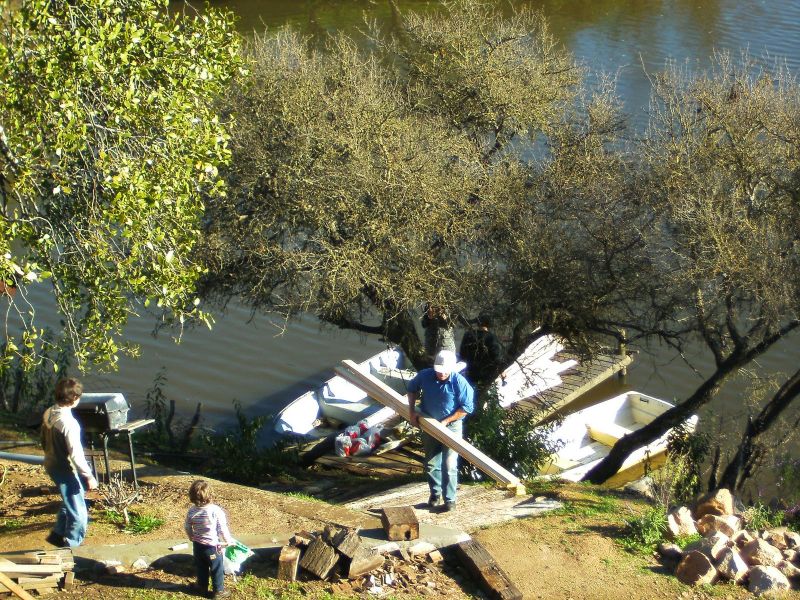
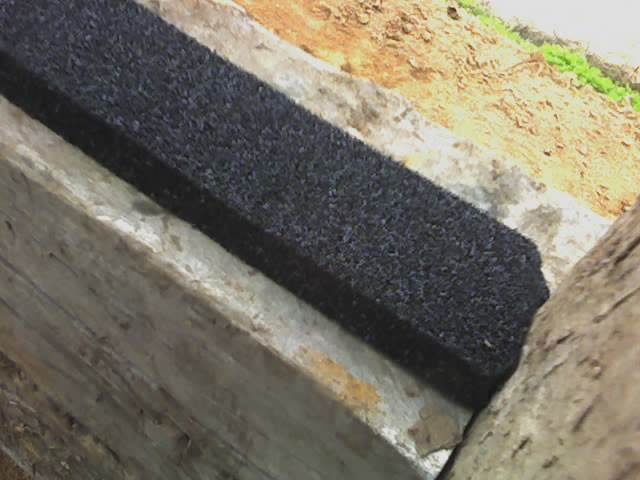
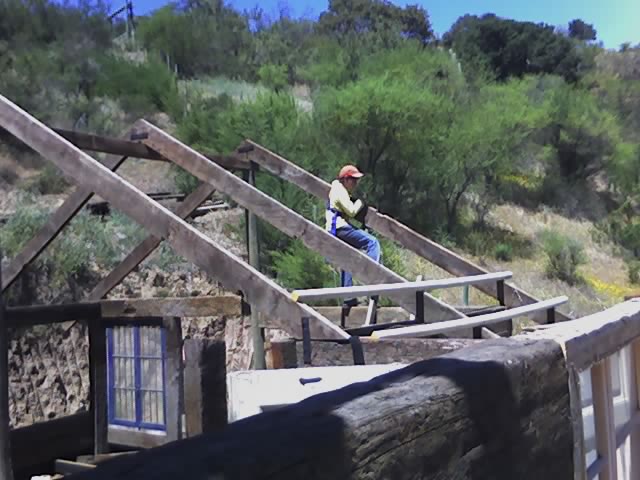
Meanwhile we found time within Don Hernan`s busy schedule to build a small fishing and diving dock (small because it will only be for a couple of years until be build the terrace) and a stair of sleepers to go down from the house to the dock. You can see me standing with my best face of "I own this dock" in this photo. Will it float! When we were almost finished with the floor structure... winter was here, and it started raining... And it rained for a week, and with the rain came the mud, and the edge of the perfectly levelled terrain started to slide slowly down the hill towards the water. A couple of weeks before we had forgotten that this could happen, and about the safety margin... and got too close to the border with two more pillars to accommodate a bow window in the living room. These were the only two pillars that were damaged by the sliding and had to be removed. The next morning we all secured every "still single" pillar with the rest of the floor structure and I prayed...
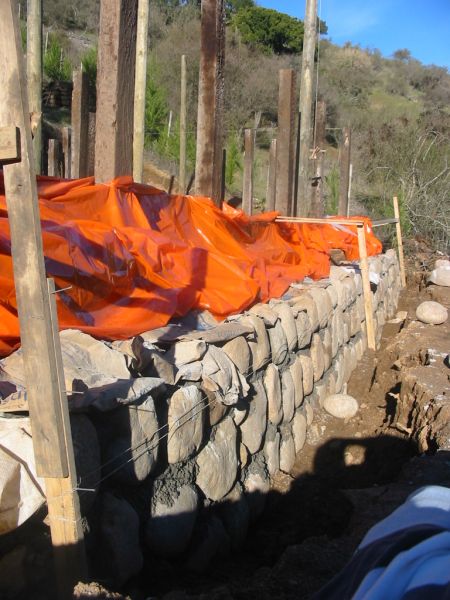
 And the next week the construction of a containment wall of concrete and stone begun. And the two pillars for the bow window will go interlocked into the wall. The wall is 50 ft long (16 mt.) and is has another second section to the back of 20 ft to keep the road of continuously going into the house spot with the same rain. This unplanned containment wall has demanded a large truckload of stones, another one of gravel and two weeks of work of Don Hernan and one helper. It also demanded as much investment as all the sleepers. So I guess this is the first of the things I would be complaining as an owner to his constructor. But being my own constructor I can't complain... (not without a mirror at least). Plus, not so deep down I knew we would need it (and that it would be expensive), but wished it wouldn't be needed so soon, and that I could finish the house without it. Right now most of the wall is built and we can rest assured that the house will stay were we first planted it. In a couple of weeks we will start building the walls with railway sleepers and fastened with the mighty TimberLock bolts (we got another 100 in our recent trip to the Laguna Seca MotoGP races). Looking ahead, we still have to practice more on the railway sleeper cutting, and try out a compressible rubber band call CompriBand (duh!) to seal the uneven spots that will be left between the sleepers. So far it's been a fun and large project, and everyone is helping build a little of our lake house.
A house of Railway Sleepers - Part 3
.jpg)
.jpg)
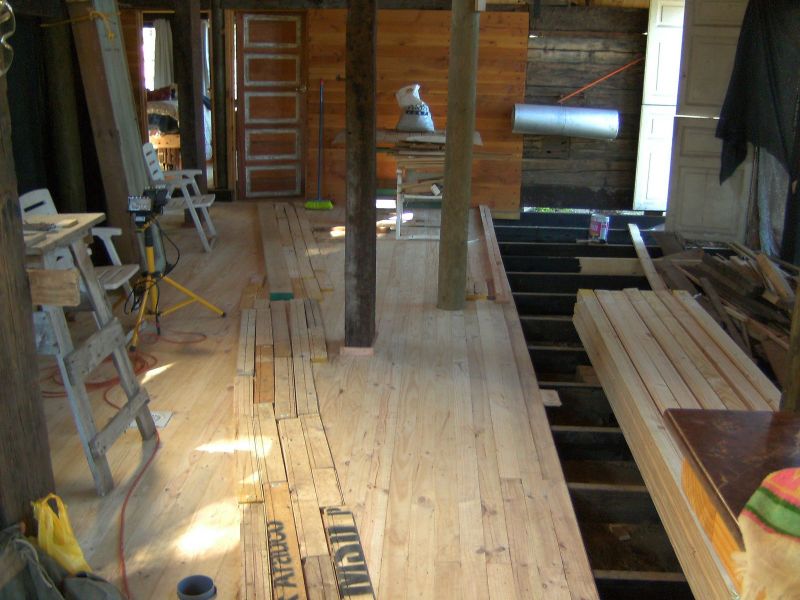
Well, I'm happy to report the wall is finished and nothing is sliding downhill nowadays (with the notable exception of our 2 year old Domingo and his grandma, but that's another story). Given our construction helper-employee-handyman don Hernan's impeccable work building stone walls (stone wall building is typical of lakeshore terraces in Rapel), we asked him to build a smaller wall to keep the road from going into the house. So now we have two walls and the ground is not moving anywhere near the house. Last week we advanced more with the floor structure which turned out to be a lot more work (and wood and bolts) that what I originally expected, and we have the rooms and the kitchen ready now. We still have to add the beams that will support the bathroom and most of the living room. My wife Carolina, my older son Pablo and me teamed with don Hernan worked all Sunday and advanced a lot.
 The Bolting of the first railway sleeper! We couldn't resist the temptation to add one of the sleepers that make up the walls, to try up the concept and the timberlock bolts. We started with one in the back of the house in the kids room, just in case it didn't work out, but luckily it did. What we do is cut a 6 cm x 6 cm edge on each side with a disc saw, so that the thickness of the wood to be bolt on is not that thick (a railway sleeper is 13 cm to 17 cm thick). Then we fasten a couple of timberlocks to each side. You can see the result in the image. Fastening an Oak sleeper with timberlocks is harder than what the publicity says (no pre-drilling... yeah right!) but still pretty (read awesomely) easy compared to studs or anything else we have tried. We had to drill holes or the timberlock would only go about two inches into the sleeper, but after drilling them you can drive the bolt all the way (this means 8 to 10 inches) into the sleeper. At first I tried to finish bolting them with a socket wrench and discovered they are a lot more elastic than a regular iron stud (which are as elastic as Playdoh, and just as useful with sleepers if you tight them all the way in). Then we discovered they will go all the way in with a 600 rpm regular hand drill and in the process make the railway sleeper sing, or scream if you wish... It's heard at as creaking noise when you bolt a stud by hand (like a scream in slow motion), but when you drive them at 600 rpm it's a whole different sound! So, we have proved to ourselves that the whole idea of the railway sleeper walls and the timberlocks work (not a small detail for a railway sleeper house), so I felt obliged to thank the gods with a sacrifice.
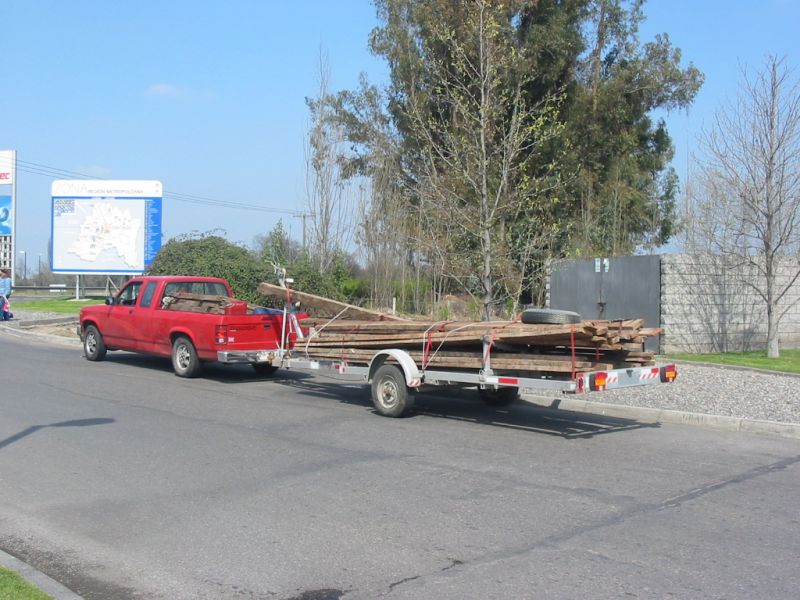
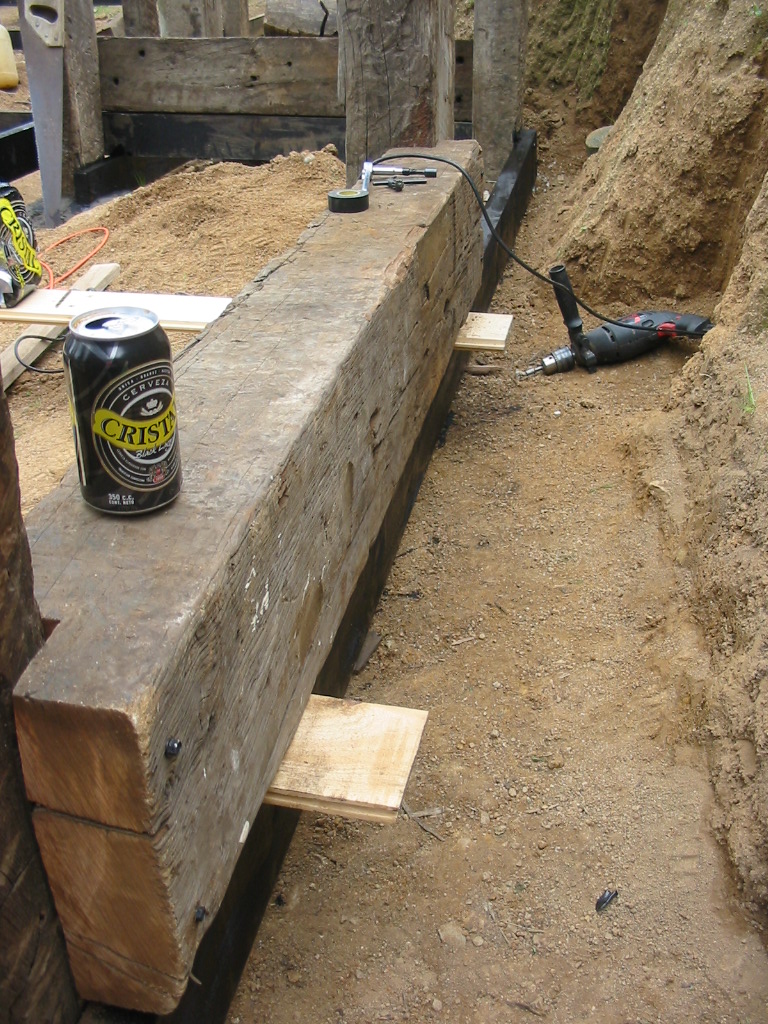 I opened a can of stout beer and drank it with a fake "I knew it" expression and a deep satisfaction that they actually did go into the railway sleeper, and that the disc saw actually worked too. From what we have seen so far these logs are chainsaw and fire territory, the wood is so hard it defies physics, I don't think they'll even float. On the seventh day... U haul! After a late lunch we packed and drove back to our city house in our pickup truck hauling the empty sailboat trailer, so next week we can go back to the lake with the six huge windows and hauling the 20 feet roof beams we got at a 100 year old school/convent demolition around six months ago. It's a five day long weekend (national holiday plus a bridged Monday), so we intend to advance a little more, maybe get some work on the roof or walls done, as well as resting and enjoying the lake.
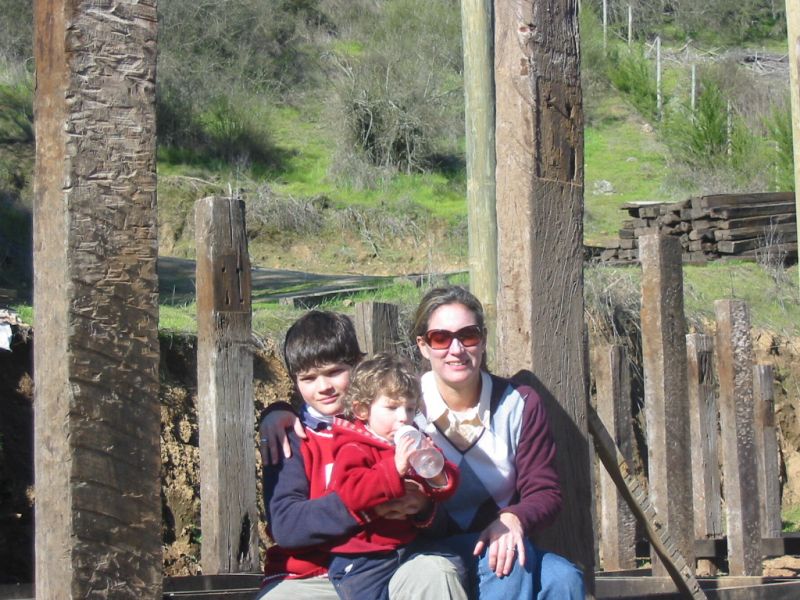
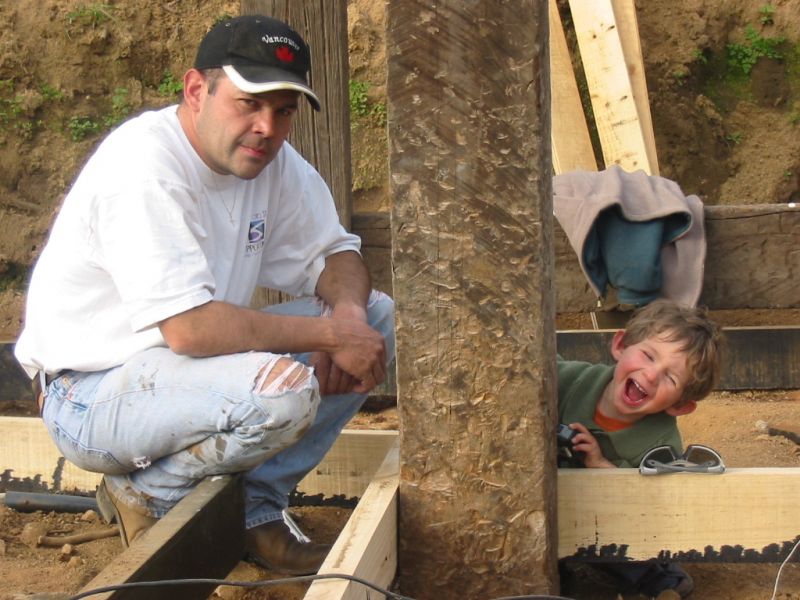
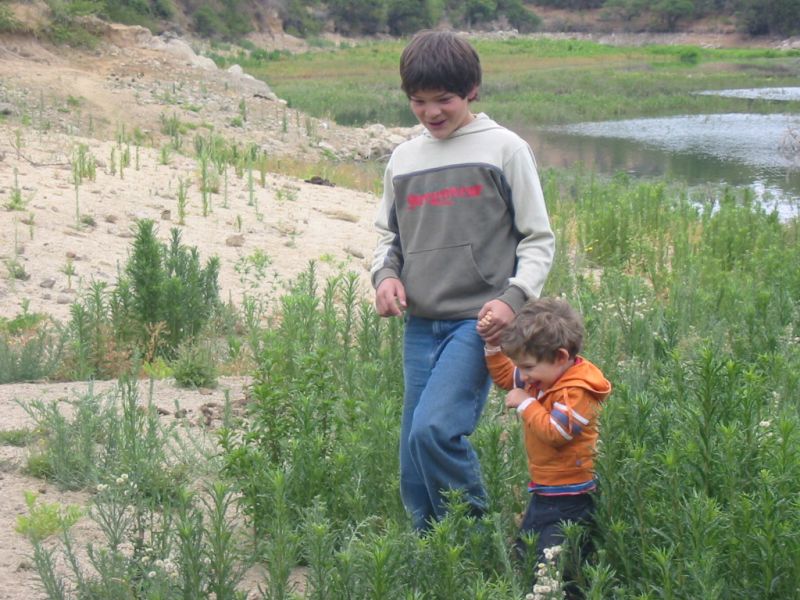
The "crew" at the Construction Site These two are from the previous weekend, but it's a good thing since we weren't so dirty that day!
A house of Railway Sleepers - Part 4
More than a month has gone by since the last article - there's been a lot of work at my new job lately - and weekends have been a lot about building the house but not so much about writing about it... which I have decided is a good sign. The project is picking up momentum as we managed to start getting away from the floor. I'm staying in Santiago this weekend so I've decided to catch up with the writing in two articles that will bring this electronic chronicle up to date with the physical building.

We drove back to the city with our sailboat trailer so we could carry back the 20 ft. and less beams that go on the roof structure. We got these from a 100 year old school and church demolition, and they were stored in our house in santiago, safe from the winter rains that could damage them and bend them. We spent the first day of the mid September four day long weekend loading the beams into the trailer and 3 of the heavyweight champion 4 x 5 ft. windows from the same 100 year old school into our truck's bed. We had to drive slowly but didn't had any trouble along the way. You can see how long the wooden beam express looked parked in a rest area along the highway.
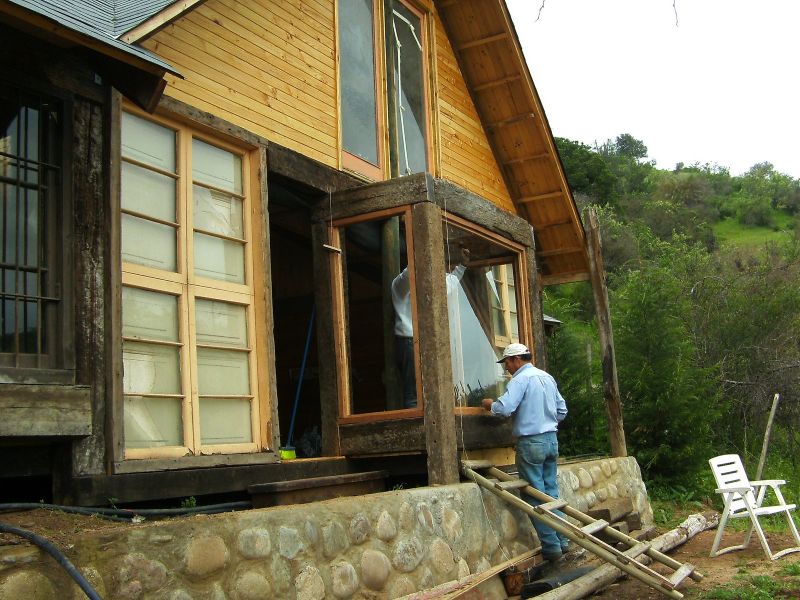
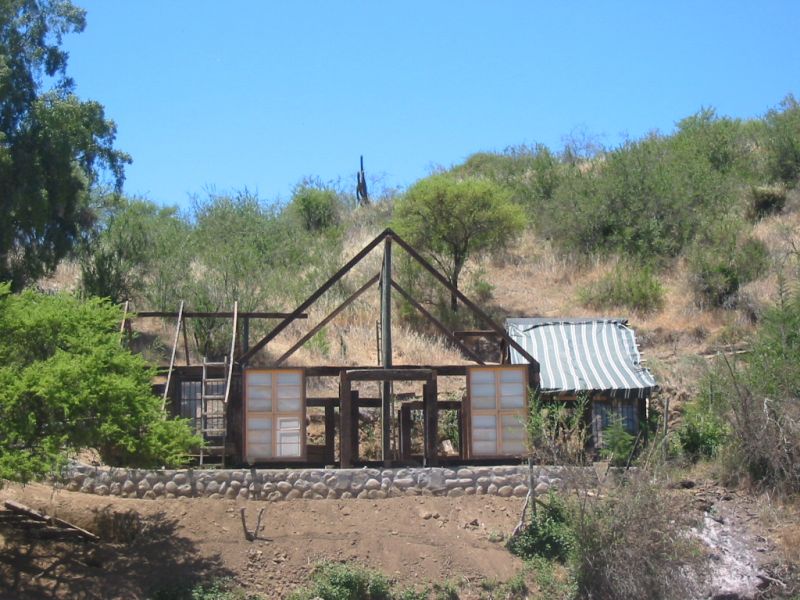
The first windows and walls. When you are a kid and draw a house you usually start by a horizontal line - the ground - to support it, and then you get right on to drawing the walls and roof, a fireplace if you don't live in the tropic, and then you usually add a window or two and a door. It's on the walls where your house starts to take shape, it could be anything yet, but as a shape is far more rewarding than the horizontal line. Once you add the roof lines the drawing becomes unmistakably a house. Well, believe it or not, the same happens when you are building a house. the foundations of the pillars and the - endless is the right word here - floor structure becomes, well... endless. That's the reason most of us didn't spent a lot of time drawing the foundations of our stick houses... it's not a lot of fun after a little while. Some of us drew fences, or grass and trees, even a doghouse, but no one spent too much time drawing what's beneath the floor. When I was a 14 year old used to draw a motorcycle parked outside my house drawings, and afterwards I just drew the motorcycles and forgot about the house for a long while.
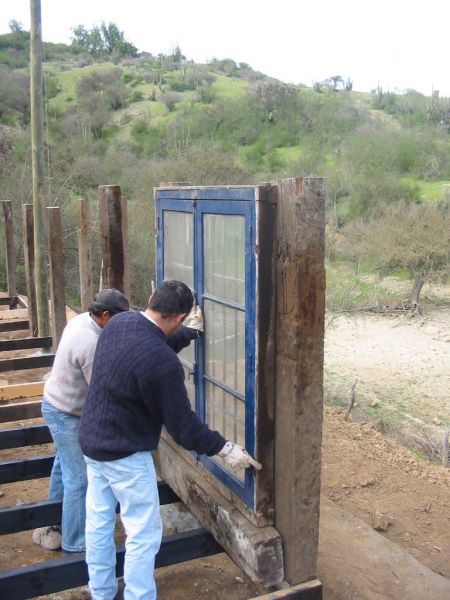
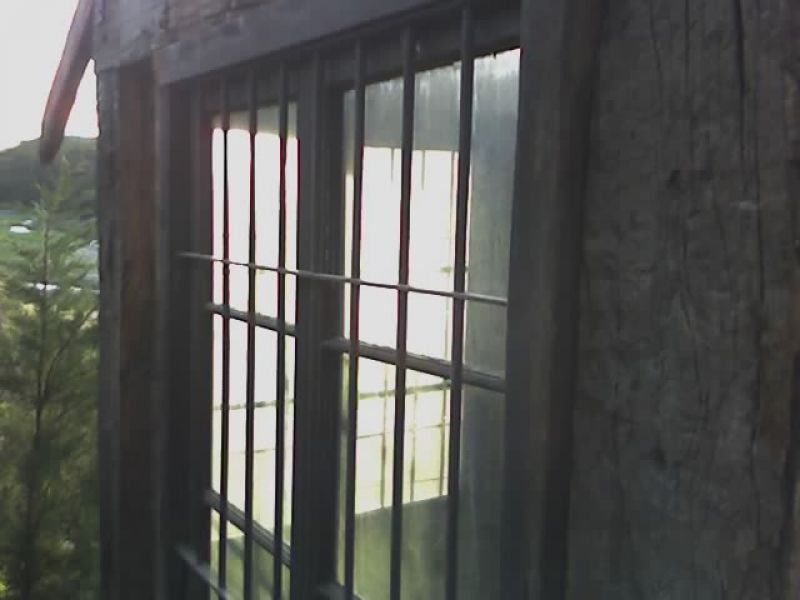
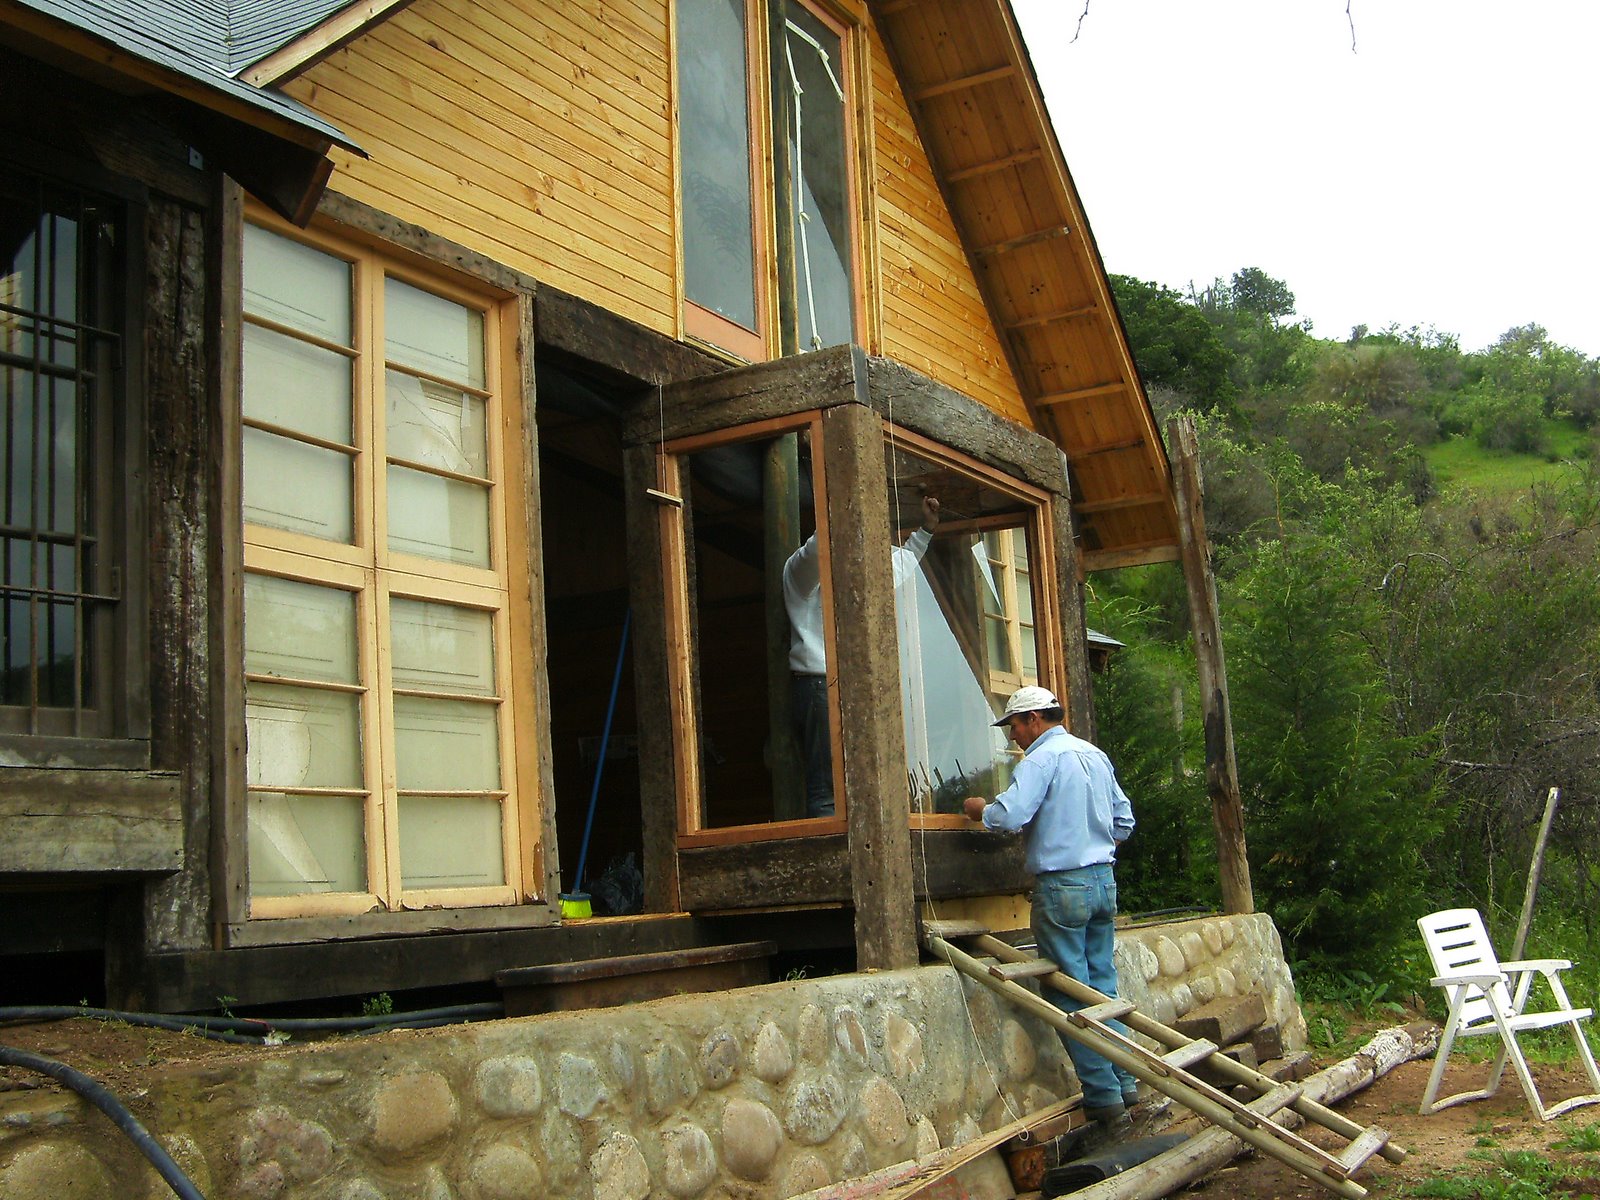
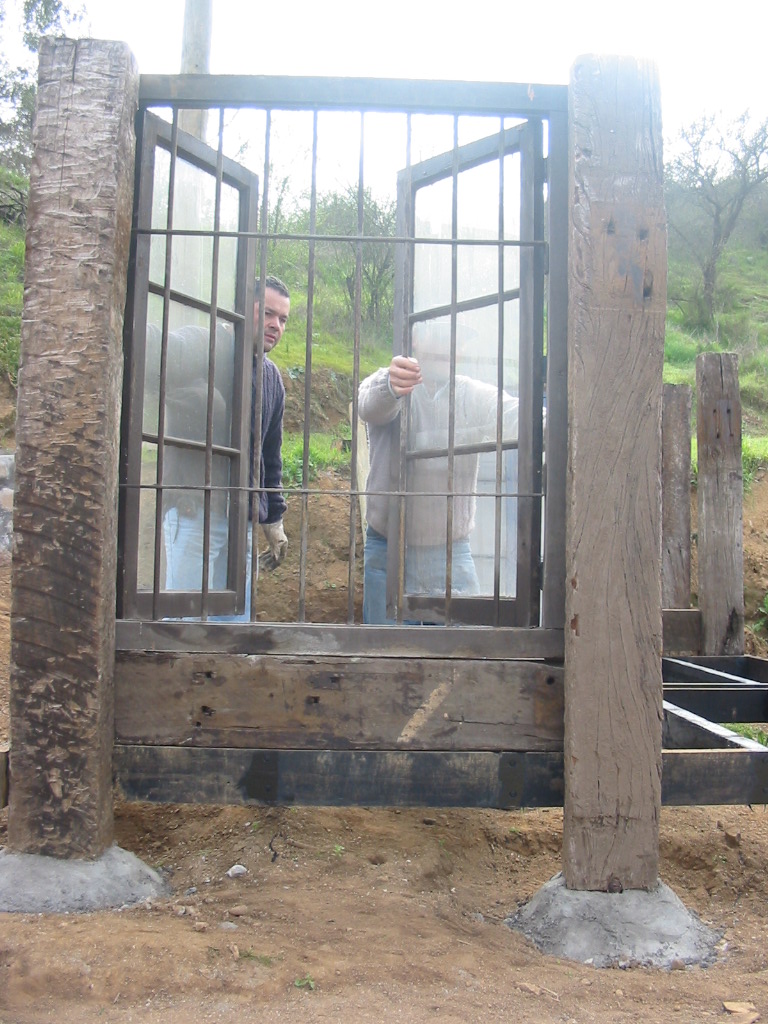 The good news about your real house is that once you start adding the walls and windows the shape does become more exciting, and if you step "inside" and aren't to sensitive to those peripheral details - like the absence of a roof - then it starts to resemble a house. Now, let's get not too excited or go too fast, after all this article is not about drawing Crayola houses but about building real railway sleeper houses, so it's not as simple as adding a few lines and you have a window. Railway sleepers are harder than that, but surprisingly they are just as irregular as those Crayola lines from my childhood. So if you try to bolt a window within two pillars you will discover that perfectly rectangular windows don't fit at the first try between two bent railway sleeper columns. This is credited to be the main reason why our early ancestors didn't bother installing windows in their caves, they were perfectly comfortable with a round hole for a door and another for the window (if you are a Flintstones fan). So you will need your trusty disc saw or chainsaw (some times you have to remove a whole board off a railway sleeper to fit the window) to flatten and straighten a little the railway sleeper faces where the window will be bolted. While we are at this make sure you buy some spare discs and chains, this wood is hard as steel and sometimes stones are buried deep into the creaks, we have already rendered toothless one disc and two chains.
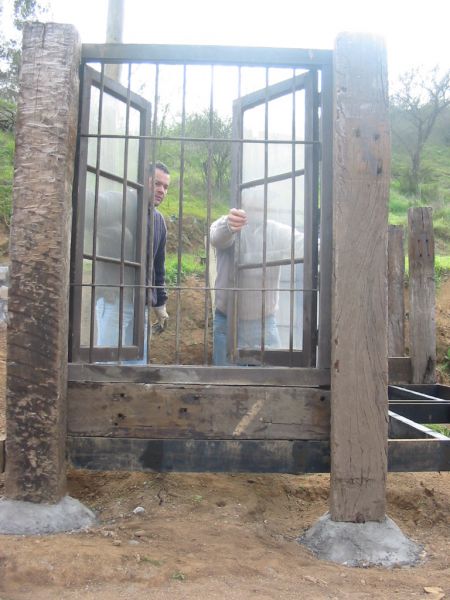
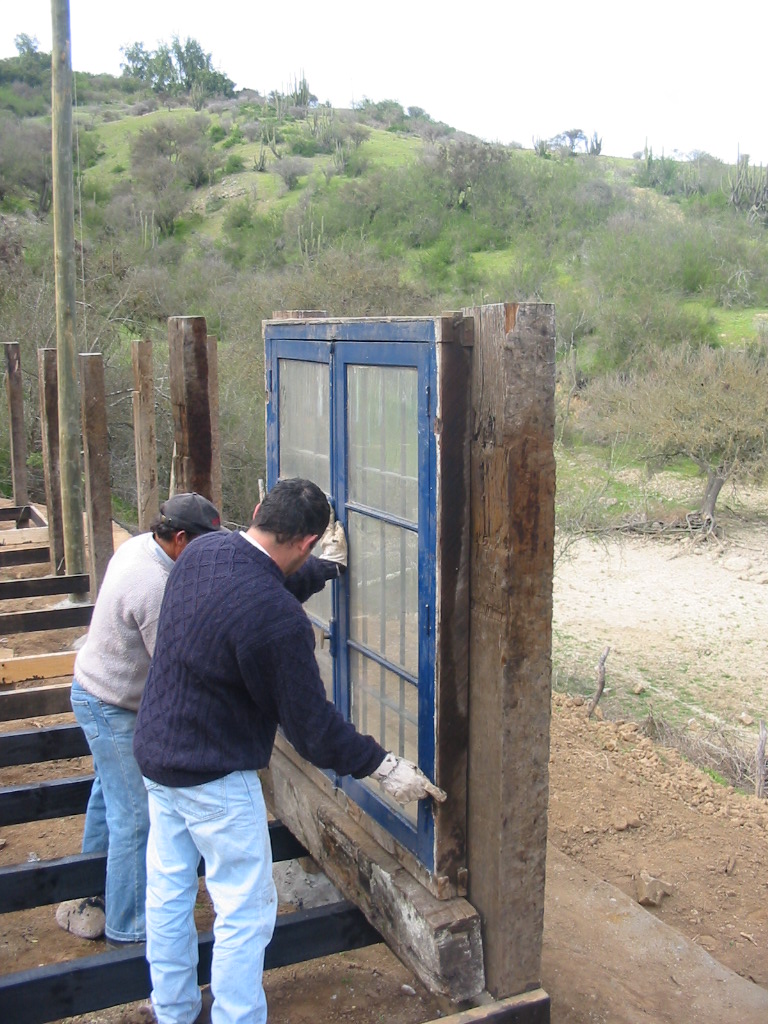 Once the surfaces are flat and the angles are square you can fit the window, tie it down while you position it right and maybe even fasten it in place with small nails and boards, so you make sure it doesn't move. Then drill the holes for the bolts, fasten the first one. Make sure everything is still in place and square and bolt the opposite one (E.g.: upper-left, lower-right), check again, and the add the remaining bolts, once you add the third bolt things will stop moving so you should make sure (yes again, trust me on this) everything looks fine. Walk around... look it from a distance, grab a beer, see if you like what you see, you're only three bolts away from this window's starting line, if you don' like something change it now, it will be harder once the upper beams and roof are on top of everything. If everything's fine, fasten all the bolts and finish you beer. Congratulations! Your wooden contraption is starting to resemble a house. If you got 100 year old windows with iron bars bolted to them, then yours weigh 200 lbs or so, and you'll only manage to install two per day and you will need one helper to keep everything in place. Once you have finished the second daily window you should treat yourself with a barbecue or something like that. Yes you can have another beer. In fact you should grab that beer and sit on whatever room you installed windows in and look outside first, and then go outside and look in from your window and back outside through the second one. It's a good exercise and one that only can be performed really in houses. Speaking about real things, installing these windows is a lot more fun than installing their virtual counterpart, and hopefully these will be more stable and last longer, or won't require frequent re-installations to keep them usable.

 Mind the gap. Even if you are a master straightening hardwood with disc saws, chances are that the railway sleepers you use for walls are not really square faced. You don't want to build a house this solid to have wind whistle at you and wildlife enter your house reminding you about those gaps between the railway sleepers. So here is where the Compriband goes. This is a highly compressible rubber-like band, that in my case is 12 mm thick x 40 mm wide and will go as thin as 1 mm once you lay a sleeper or heavy window on top of it. It will later expand and absorb any irregularities in any of the two surfaces creating a water proof and bug proof seal. It can also be compressed with the hands, squeezed into a gap or crack and then it will slowly expand and fill the hole completely and tightly unless the space is too large. You can fill the gaps at the edges of windows in this fashion and then add a small board of nice looking wood to cover and finish it up. A wonderful material really... Thanks Dad for the tip!! Once you have some windows and walls installed you can move on to the last row of railway sleepers and start figuring out how you are going to pull up the centre roof beams on to the centre pillars to begin the roof structure.? We'll see all that in the next article, along with the installation of two large 7 x 5 ft. walk through windows that overlook the lake.

Building a House of Railway Sleepers – Part 5
 Now it’s the time to add a final row of railway sleepers above the windows to make a final wooden belt all around the house, and have a tall and firm support for the roof beams. To be very honest I thought originally of making more solid walls than what we have right now, but some things have changed my point of view. Railway sleepers are heavy and they look heavy. A lot of windows and glass are welcome so that you don’t feel on a wood prison. In a lake house, one of the reasons for building it a the lakeshore is having nice views of the lake, so a lot of windows make sense (Plus the weather in Chile is not too extreme so you can have houses that provide wide open views). We are running out of railway sleepers. This is not a joke, we have discovered that a house of this size uses roughly about 100 railway sleepers between pillars, walls and beams above the windows, and that’s what we had after discounting 20 damaged railway sleepers from my total amount (tower). So we are doing two things: adding more fixed windows towards the lake and getting 10 more railway sleepers or so to finish some fully wooded walls that were on the original project and that I’m not willing to forget about. I’ll keep full railway sleeper walls in the back of the kids room, so it’s more cozy and warm, and in the bath room for privacy reasons and because I tend to daydream when I’m taking a bathtub, and I want a nice thick railway sleeper wall to look at, and in the living room as a focal point of the roughness and solidness of the house, and I intend to put either a bar or a LCD TV on that wall. On the other hand I’ll have to build 3 interior walls using other hard wood, but not as thick as railway sleepers, but equally rustic and nice on the eyes. This in turn will save some space – a railway sleeper wall take up 20 cm - and being interior wall it won’t sacrifice insulation.
 The last row of railway sleepers. One thing that we discovered when adding the top row of railway sleepers is that we had extensions to cover that were longer than 2.8 mts which is the length of my railway sleepers. So we had to cut them diagonally and assemble using timberlock bolts. The result is in the picture, If you want to have a very precise cut and assembly I recommend using a disc saw on both sides of the railway sleepers instead of the chainsaw. To fasten the top row of railway sleeper beams to the sleeper pillar you will need very long screws, even the 10 inch (25 cm) Timberlocks won’t show even more than one inch at the other side of most railway sleepers, so it’s better to pre-drill a 2 inch recess for the screw and socket to fit in, so that you have the full 2 inches of thread on the timberlock doing it’s intended work. Remember that railway sleepers are irregular in width, but you don’t want your house to be irregular (it tends to show on doors, windows and rooftops). So take the time to measure the widths of each room, and level the heights (using a carpenter level a laser level or the old transparent garden hose with water level). Cut any bits that help you get a perfect level on every room.?The final row of railway sleepers is your final chance to achieve right angles, and horizontal surfaces where you’ll start building the roof structure, which is already complex when things are square and parallel, you don’t need any synthetic complexity in it.
 Building the Roof. I had long 17 – 20 ft (5 - 6 mts) oak beams for the roof structure. These go over the center beam atop the center pillar and are fastened using metal plates and bolts with nuts on each end. I had 60 metal plates custom made in a local shop, and they are 10 x 2 inches (25 x 5 cms) and 5 millimeters thick. They were very nice and shiny when I got them, and I had the doubt of applying clear lacquer of flat black paint to protect them from rust. I finally went with the flat black paint. I also made 6 longer 18 inch plates (45 cms) to finish the fastening of railway sleepers on each side of a center beam. The lower roof sections are easier to assemble, but we played it safe and when working at heights we wore a harness and safety ropes just in case. In the higher roof structure in the living room center pillars at 20 feet this is both common sense and a necessity, since you nee the person in the top to handle heavy beams with both hands, bolt them and even drill. Even though I would recommend assembling everything on the floor and then raising the whole structure either lifting it vertically or pivoting a la amish-barn-building as you can see we did on the back of the living room roof. Assembling the structure on the floor demands placing the beams up on their intended position, marking the cuts and then lowering everything in order to cut, drill and bolt together. It is more work but the results are better and is less dangerous than trying to assemble everything on the spot. After finishing the structure we have to secure it to the upper row of railway sleepers of the house either with the iron plates if they are in the perimeter or with 10 inch Timberlocks inserted from the top if they are central, beams. Now we have to put on a layer of struts so that the roof boards won't bend under their own weight and of the asphalt shingles. I used a layer of 2x2 inch struts spaced at 20 inches (50 cms) according to some construction manual my roof boards won’t bend with that spacing. Time will tell…? Then we just have to add the roof boards, these are about 1 cm thick and 5 inches wide in case you were wondering. I’m sure that’s as relevant to you all as the year of the Carmenere wine that’s fueling this writing. Here are some pictures of the roof of the bedrooms with the roof boards installed. And some more of the rook structures of living room and kitchen. What’s next ? Let me repeat that it’s looking more and more like a house, but there’s still a long way to go, I have to install a few more glass panes, and solid railway sleeper walls, and then closing all the gaps between the roof and walls, wiring the electric circuits and adding the floor boards. And then the bed room doors. Then my first goal of the four of us spending this new year’s eve at the house will be achievable! Then to finish the house, I have to wire the other electric circuits, install some other glass panes including a large bow window… close the very tall front and back of the living room roof, and add all the floor boards, add walls and window and door to the bathroom, install all the bathroom appliances. The living room is lowered and has Oregon pine steps that lead to the rooms and the kitchen, and match the Oregon pine bow window frame (match in my mind, the steps are in my house in Santiago and the bow window frame is not even cut and I'm just beginning to sand the whole interior with an angle grinder... a pretty dirty job I must add). In the kitchen we have to add the floor boards after the plumbing and electrical piping is done, add a couple of doors a small (2 ft tall) separation from the living room and then the center table, which will have a marble top thanks to my sister Pamela. Then we have to add all the kitchen appliances. And let’s not forget the septic tank or will be up to … well you know what happens. Still a long way to go, but I believe we can have the whole house closed before the end of the summer (in late march). By Early May we should add a couple of chimneys and a wood furnace in the kitchen.
Future Stages? Sounds like a lot? Not really if you look at it in perspective, this is only Stage 1… for next year we have the Stage 2: stone and grass terrace by the lake, with built in bar in the water, and then Stage 3: the 10 feet wide wooden terrace surrounding the front of the house, and later on Stage 4: the second floor so my almost 13 yr. Old son Pablo has his own space, and then Stage 5: Caroline & me will have a large (400 sq ft) stone room in the terrace by the lake with hot tub, chimney and breakfast table. Even later on will come Stage 6: a separate stone room for playing pool and having drinks by the sunset on top of it, and even later Stage on 7: a 4-car and 6-motorcycle garage on the top of the hill to move all my toys when we finally are able to start living by the lake. It’s a long plan and a fun one, we are at the first half of Stage 1 of the project. Meanwhile the water level in the lake is up again so we have sailing and kayaking between work hours.

Building a House of Railway Sleepers - Part 6
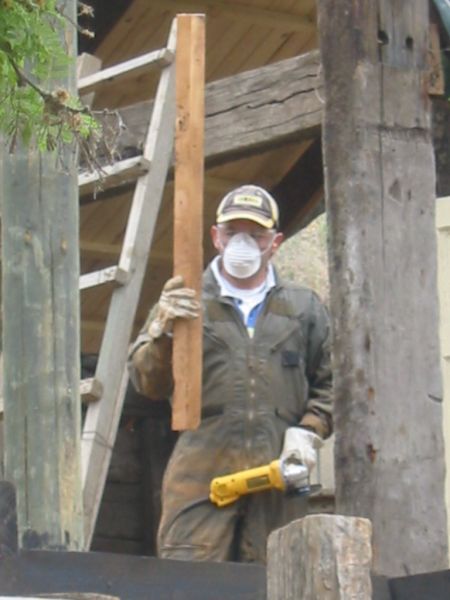
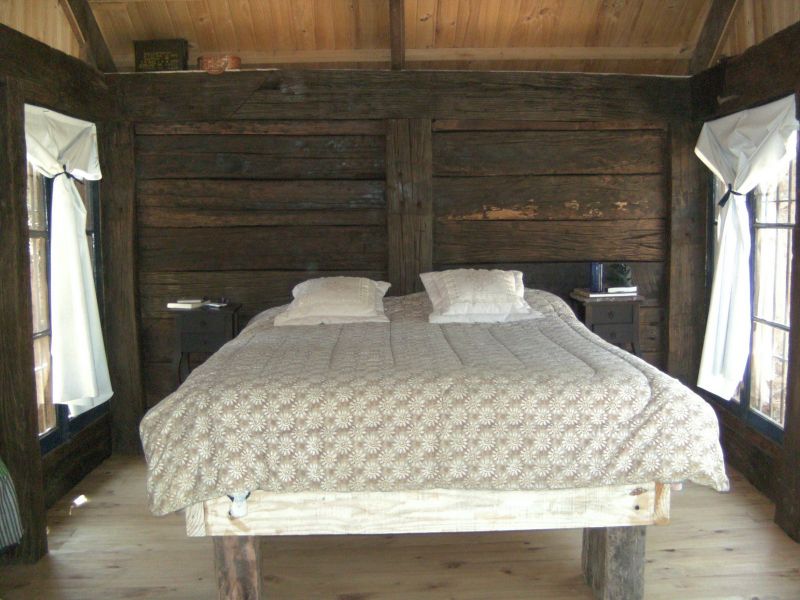
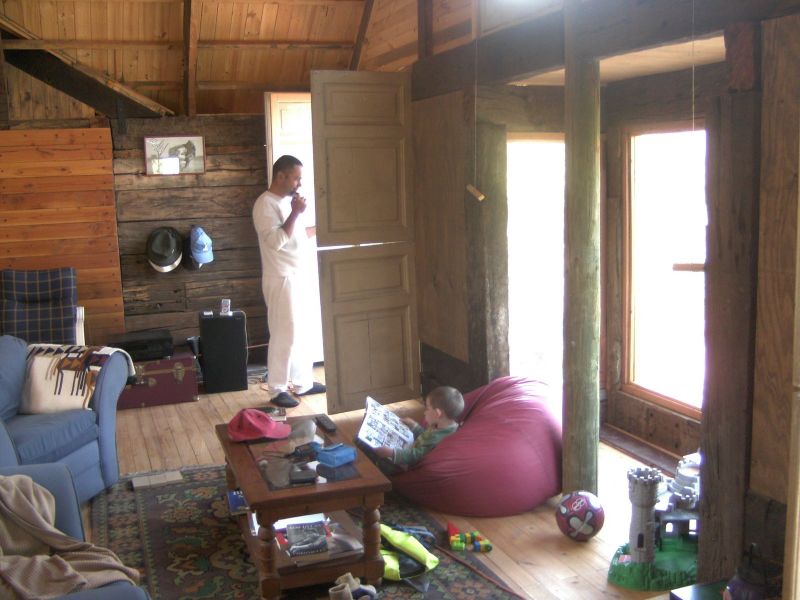
It's been a long time (about 4 to 5 months!) since the last house building post. So I believe a little recap is in order. It hasn't been out of laziness (well... not entirely) but because of buildiness...!! The rooms are (room is) Ready! Finishing the railway sleepers on the rooms turned out to be a very dirty job, and I had to get a serious mask so I didn't breathe all the cloud of dust that comes out of cleaning and sanding the railway sleepers with a wire brush in the angle grinder. After I was done with all the walls my son Pablo and I applied Linseed oil to finish all the walls in a opaque look that has kept looking nice over the last 3 months. The rooms were ready for New Years Eve (goal met!), but we didn't sleep in them because I hadn't build a bed or bought a mattress yet. Since these two were in financial conflict with getting to the end of the year, and buying more roof boards among other materials. But... we spent our first night in the rooms the first weekend of January, just with the boards on the roof (no shingles, we could see the sky through the holes of the knots in the roof boards), and the two rooms had no dividing wall between them. That night with our mattress on the floor we discovered that a 10 x 20 feet room overlooking the lake is very adequate, and much better than two 10 x 10 feet rooms (one of them with view to one a dividing wall). So we decided that it would be better for us and the kids if we kept the large room all to ourselves and they have no room at all, and sleep in the living room and in the upper floor later on... Being young they don't seem to understand the rationale behind this. So I'll have to build a nice second floor and the room for us, so they can keep our room before they can hire a lawyer and sue me! We still allow them to sleep in the room with us yet anyway, since the living room is not done yet, and still lacks walls and floor.

Room 721.That night we realized that our large new room has 7 windows, 2 doors and 1 step, and it has a good 180 view of the surrounding landscape. We also discovered that once the sun is up so are you, so the next week we added blackout curtains, so we could sleep a little after 7:00 am. Now we can develop photo film at noon if we wish to!
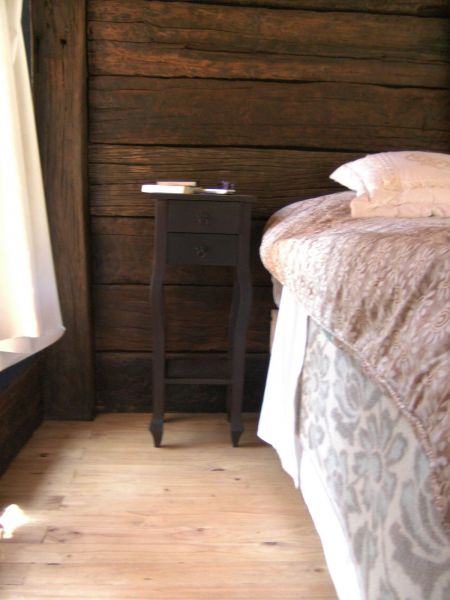
Over the next weeks we have equipped the room with a bed, mirror, night tables and storage for sheets and blankets. Along with railway nails to hang jackets and stuff. We also added the very cool double action wooden window to the (future) bathroom wall.
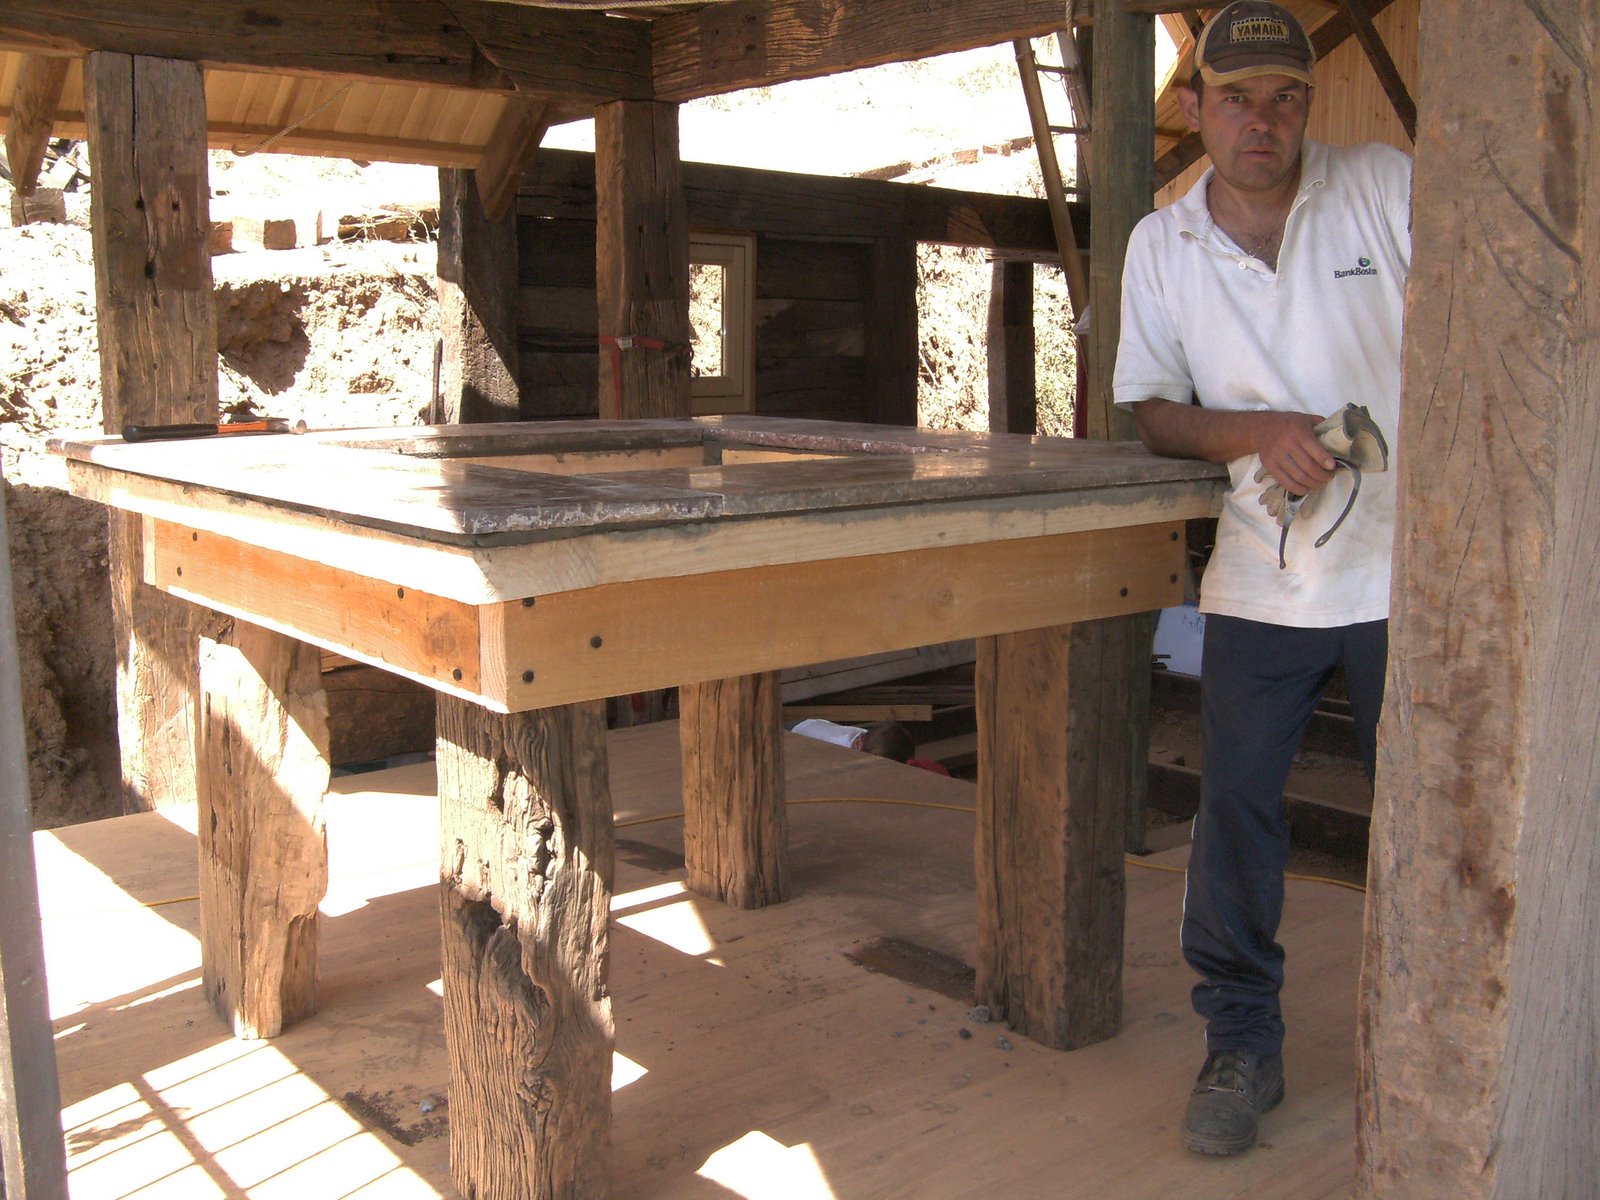
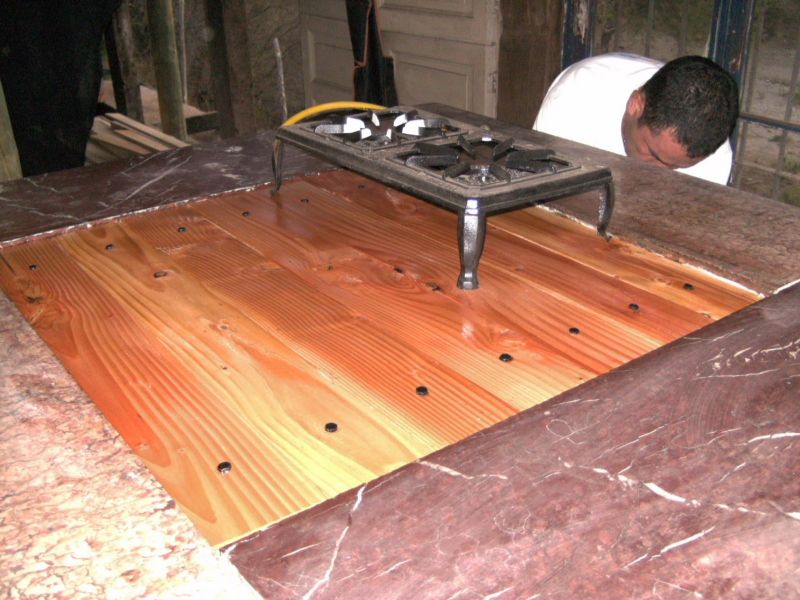
The Kitchen & the Table. On February we vacationed on the house for two weeks, first with the kids and the second week alone by ourselves. During those days we built the bed, the marble kitchen table with the marble my sister Pamela gave me as a present, and finished the kitchen in the same way (dirty wire brushing and Linseed oil) that we finished room 721. We also applied oil to the wooden part of the table, and then we put it to good use cooking pasta, fish, steaks and hot dogs (Domingo's favourite meal) and everything else cooked in the very fast gas furnace my mother gave me for Christmas. The table was a lot of work, first we built the wood structure for the surface, then added the railway sleeper legs, then a half inch layer of concrete where the marble would rest and then the red and white marble pieces in a circular fashion. The next day we added the centre piece made of Oregon pine, and sanded and oiled everything, all in all two days of work. A lot if you compare it with the bed (also with railway sleeper legs) built in two hours. But it's not my first bed (it's the fourth actually) and it was my first Viking style kitchen table. During the vacation I also installed a water pump and a garden faucet outside the kitchen so we have water to do the dishes, I also hooked a couple of garden sprinklers next to our room, so we have fresh green grass next to the house and everything feels cooler.

Roofing. Where are we now? Adding shingles because it will rain anytime soon, so we'll hurry to finish the roof properly first and then move on with walls and floor in the living room and bathroom. I'll be adding pictures of the hopefully completed roof after this weekend.
Building a House of Railway Sleepers - Part 7
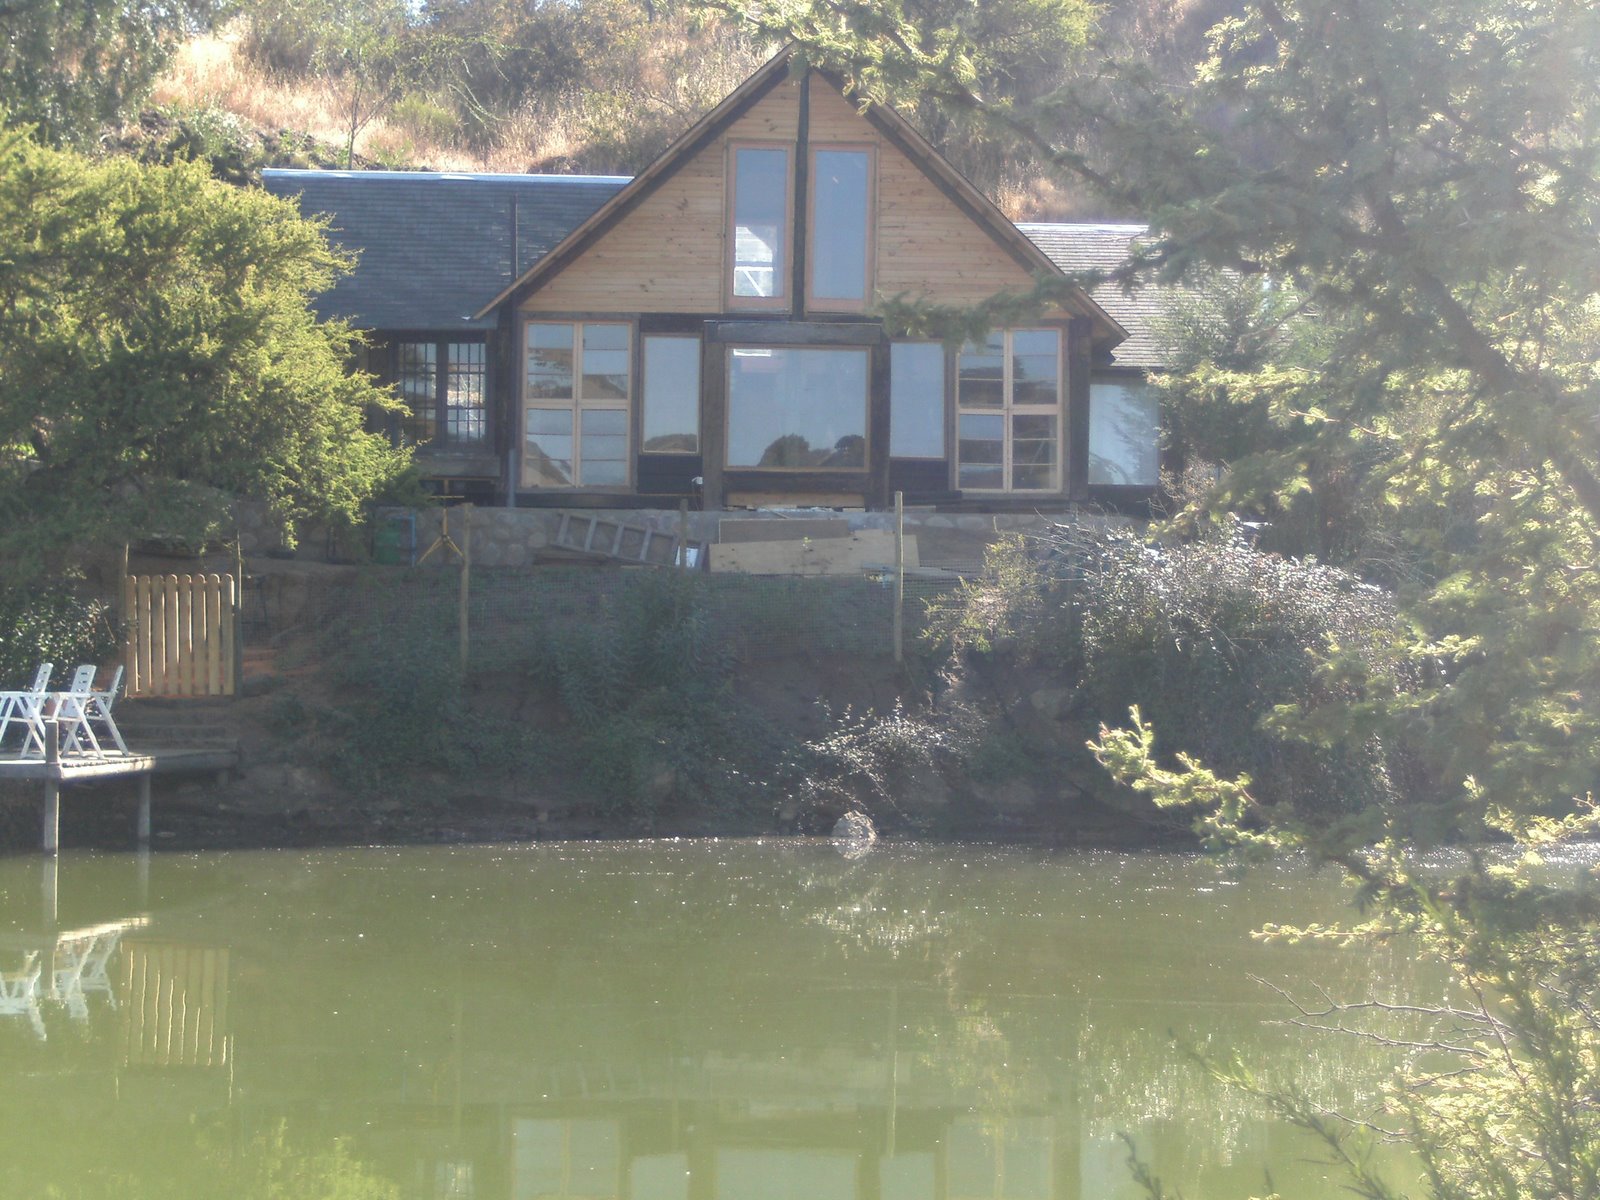
The House is Ready - first stage completed! After almost a year since the last post on the construction of the Railway Sleepers Lakehouse, it's time for an update on the construction status. This space intentionally left blank! The heat is on. 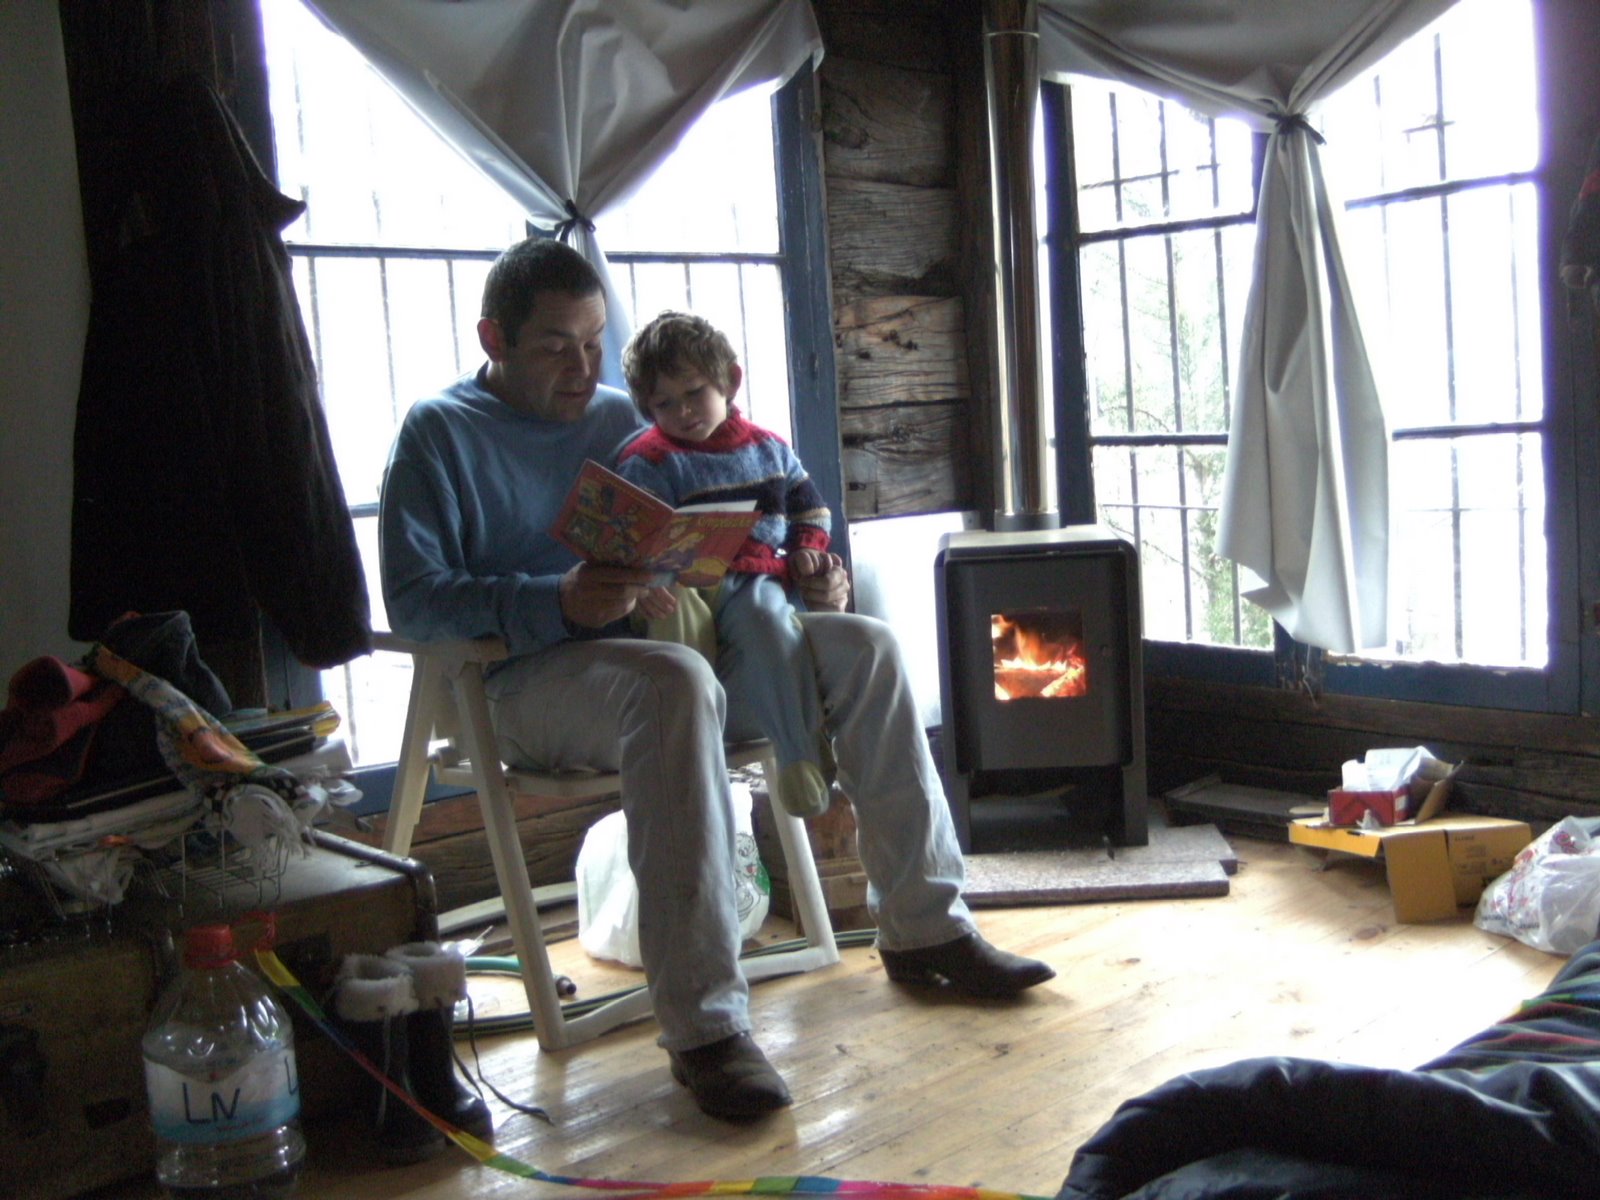 After we finished the bedroom and the kitchen in order to spend summer vacations there, we continued building steadily, in April we put an ecological wood furnace in the bedroom so we'de be prepared for the colder autumn temperatures. Putting the wood furnace in place was pretty straightforward, as the mounting kit came with all the needed hardware (outer duct, inner duct, isolation so the roof won't overheat, everything...). The only extra we needed was to add a silicone cord where the outer tube meet the metal sheet over the roof, so water won't slide in there into the room. It's also highly recommendable to put metal sheets in the places where the furnace is close to the walls and the floor, as you don't want the entire wooden work of art to catch fire and go down just like Jesse James in the famous song.? We used spare marble from the kitchen table for the floor so it would look nicer, the sheet metal on the walls is hardly noticeable so I left it as plain metal. And it started raining for 40 days.
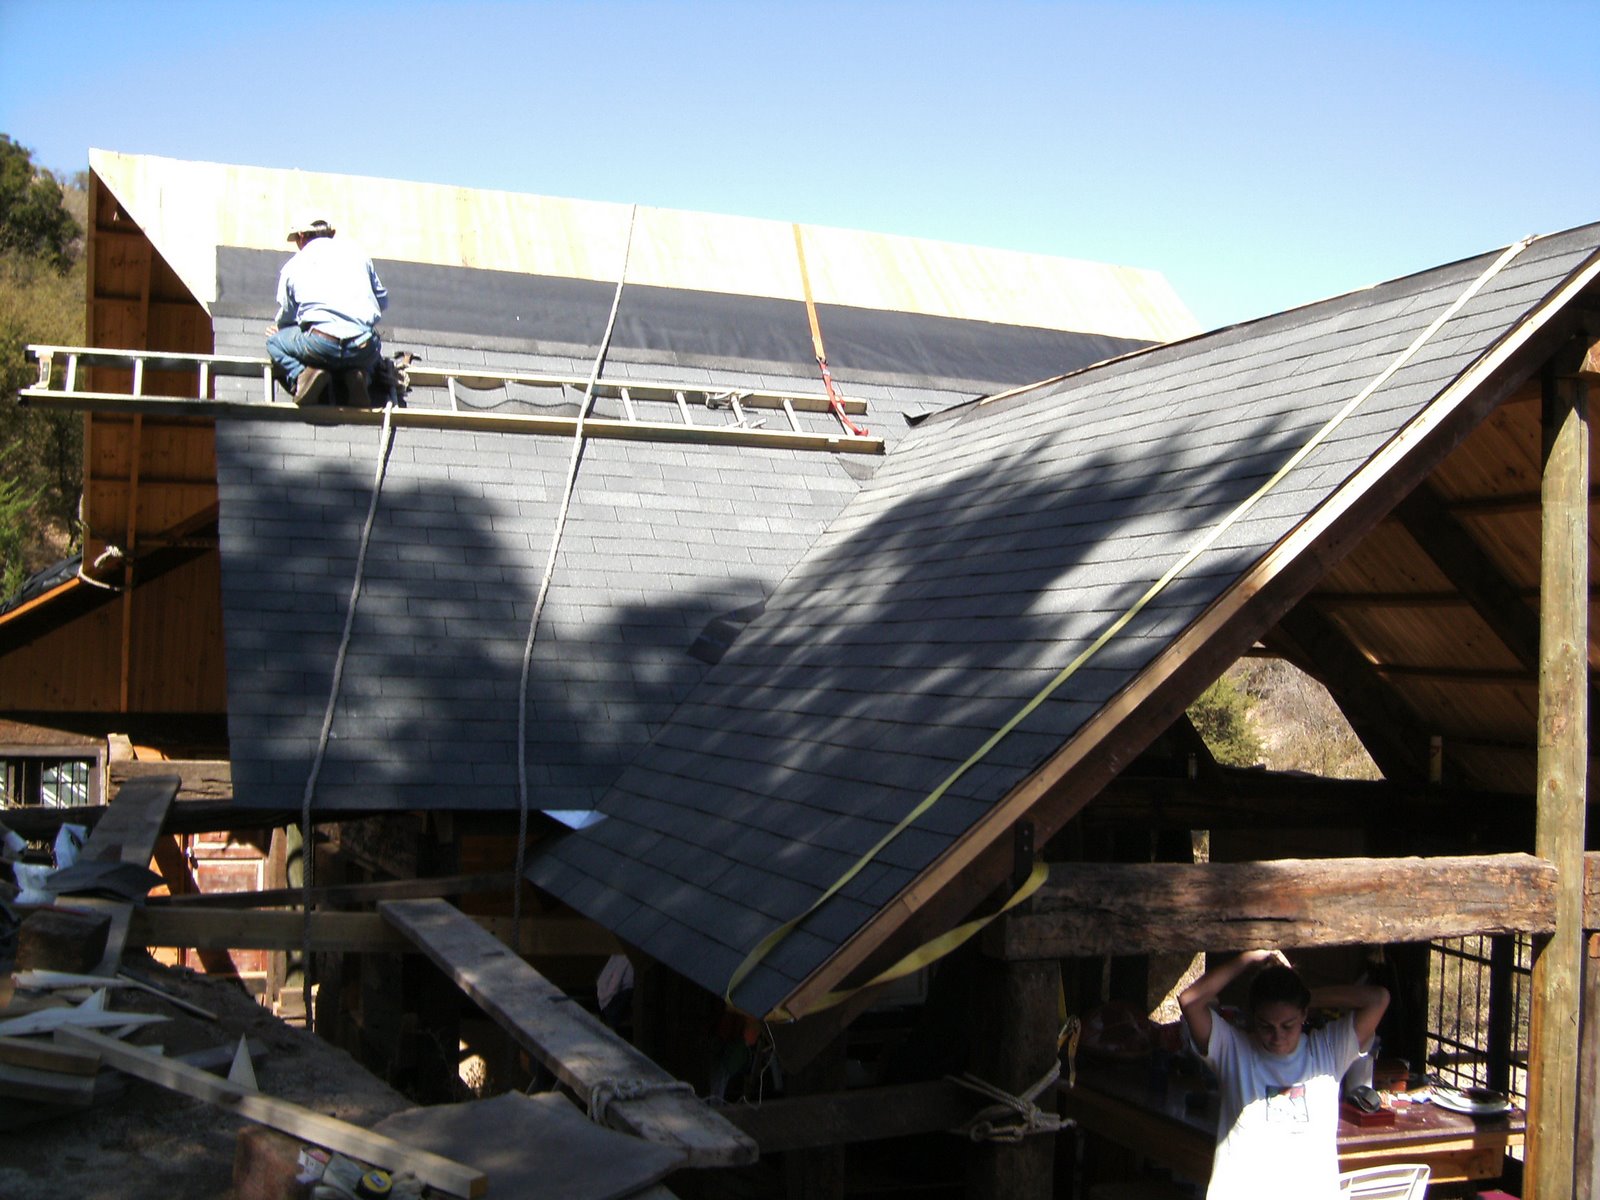
Then we had to run and put the tiles on the roof before the first rain, so that the roof boards wouldn't get wet and take the sexy shape of an Noah's Ark. Actually it started raining before we could do that, so we had to go earlier and cover the whole house with plastic (this is way faster than tiling). So any of you need to cover a house in plastic, as a work of art, installation or any other massive use of plastic let me know, I happen to have 1000 sq. ft going spare!. For the roof we selected light gray asphalt shingles form Owens-Corning, as they are light, not expensive and are guaranteed for 20 years, so they seemed a pretty good deal. The tiling took about 3 weeks, with the living room roof (18 ft tall at the center) proving to be the most difficult, it is highly recommended that you lie 2 or 3 ladders horizontally or vertically on the roof slopes for support and mobility and tie them well to something solid on the floor so they will stay on place when you are on them (unless you are a huge fun of extreme sledding on wood tracks). Safety Tip: Tie the ladders with a wide tie down (the long ones with ratchets to tow or tie cargo in trucks work well) as the smalls stones in the asphalt shingles will erode a regular rope pretty quickly (yep extreme sleds again). If you don't have those available use two ropes at every point, and a rabbit paw in your back pocket. After the roofing was ready we were ready to lay down the long missed floorboards in the living room, never mind we did not have all the walls, I was already sick of getting mud into the bedroom every time. So the flooring was done and the it was painted with polyurethane so that the water coming through the absent walls wouldn't turn the floor into Noah's Ark.
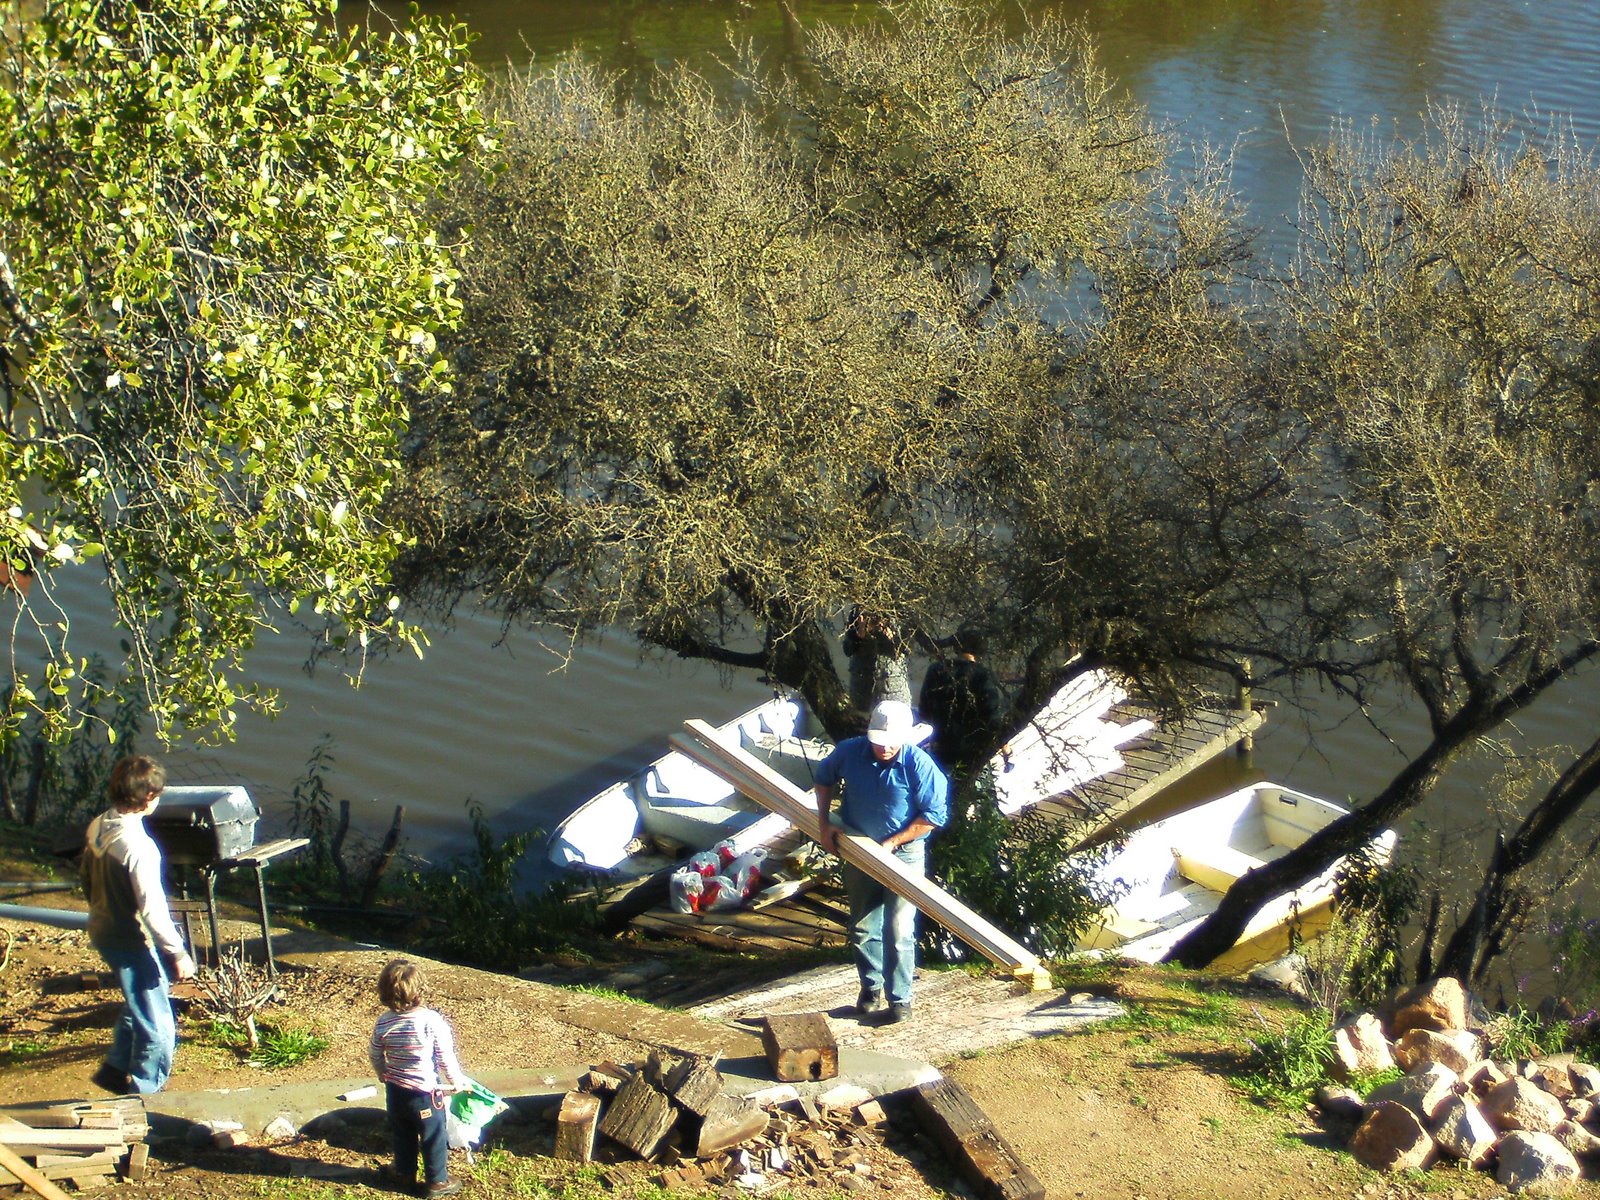
The "ferry" operation. By this winter had passed and spring was starting... Wait! Let's pause here: I should note that the road down the house gets very – VERY – bad with the winter rain (slippery thick mud, great for pottery but not for vehicles), and with 3 feet deep water cracks wandering through the road at each of the five sharp turns. So we had to unload all the aforementioned boards, shingles and nails, etc (this etc includes, kids, clothing, food and water amongst other things) by the neighbour's perfect concrete road and ramp into handy Don Hernan's boat and move all the construction materials for the house by row boat into our dock, and then unload them. Pause for air, stretch our backs, and haul them up into the house. Yep, you can probably picture now that when spring started we were happier than cats and birds and flowers, and our backs were grateful as well. We could drive our construction stuff right down to the house again, after repairing the road with the classic oil gobbling yellow excavator for a whole day.
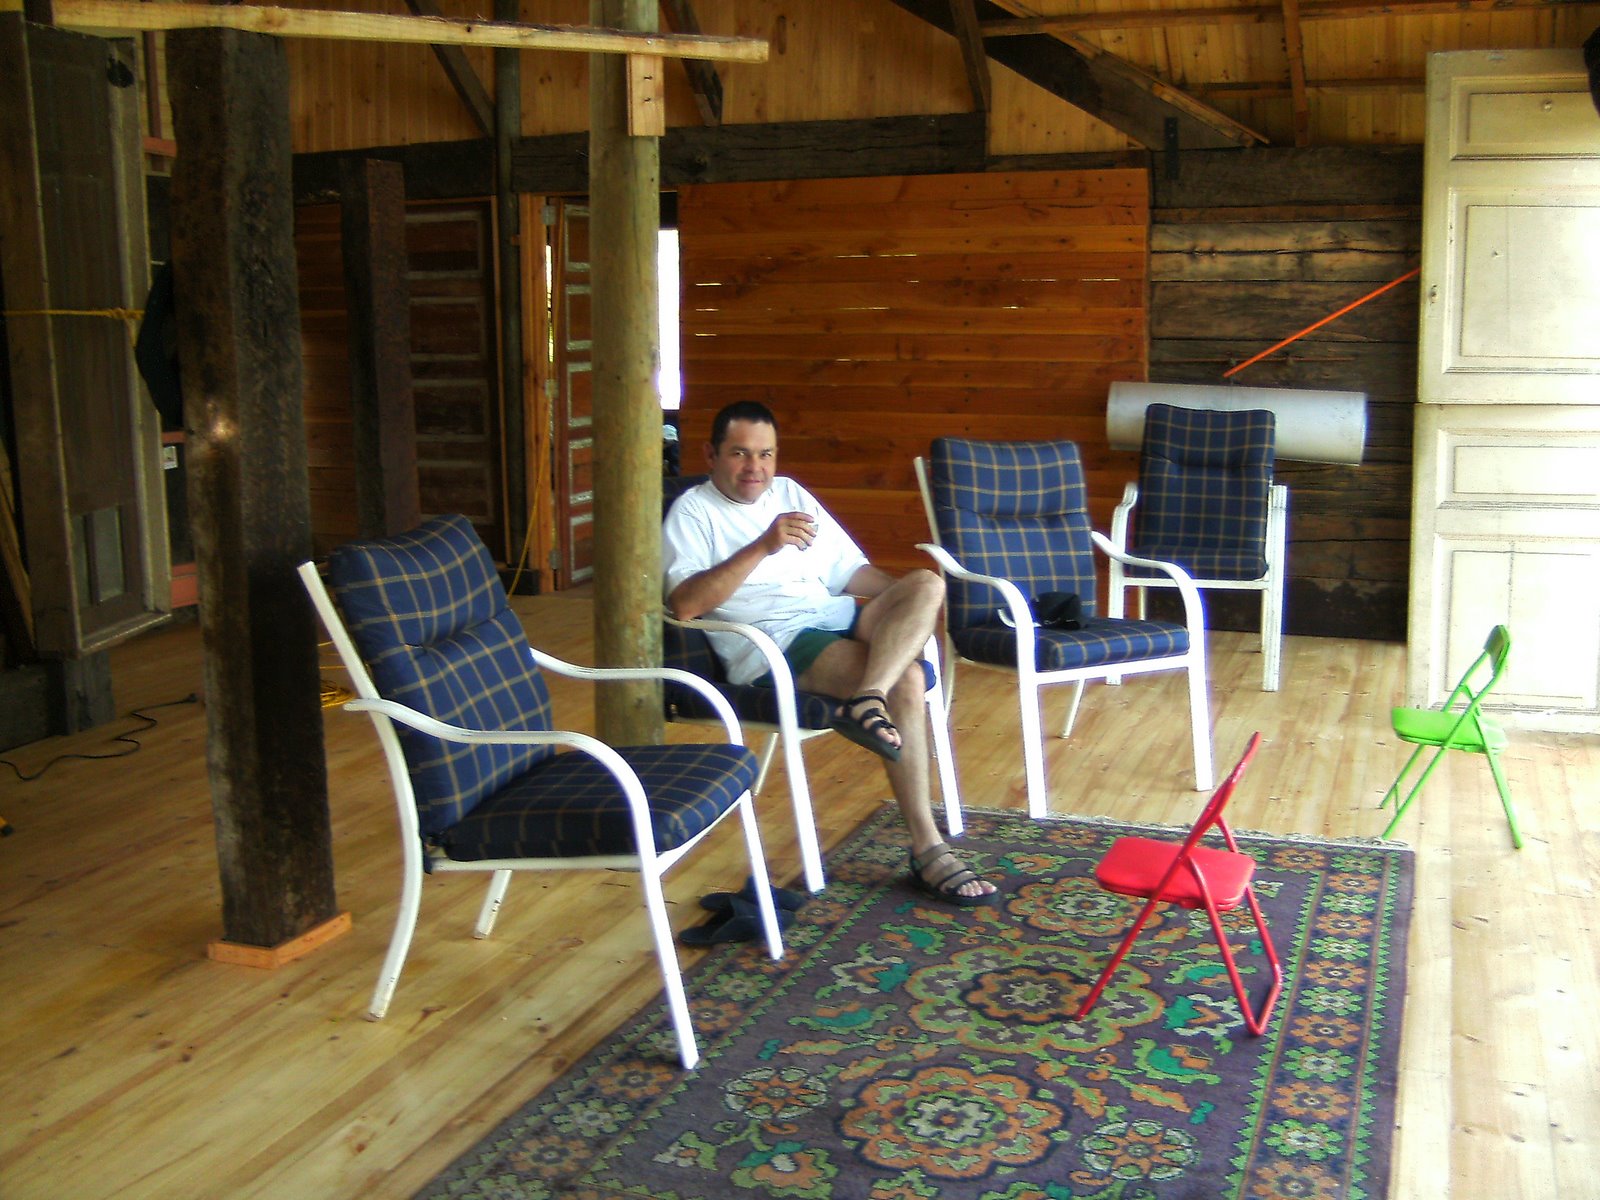
 So spring started... we were happier that cat's and birds... and we didn't mind not having walls, so did share the house with some cats and birds. We started putting some patio furniture on the living room and we finally had a house with no dirt floors. This felt pretty civilized at that time.
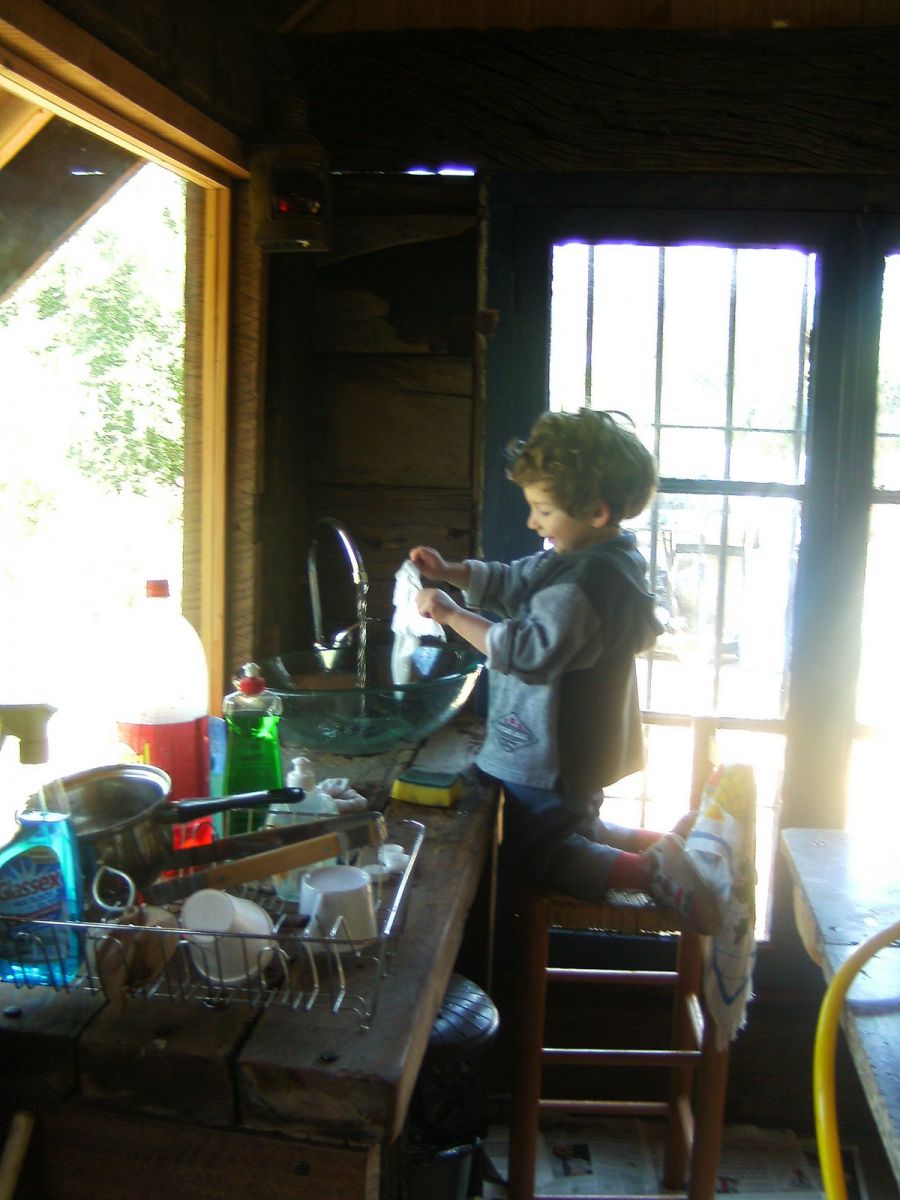
We also fitted a hydro pack to the water pump that gets water from the lake, so now we also have water just by opening the kitchen sink faucet, intead of going down to the dock, plugging the pump on and bleeding it two or three times to get water. Another huge leap for mankind, as Domingo demonstrates on the image on the left. We then started fitting on some windows on the living room and ran out of railway sleepers to finish the living room walls. So we had to buy a few more (12 by now), and while we found them we started building the septic tank, as we realized it wouldn't be a house until the bathroom was ready.
Closing down the house. But railway sleepers were getting scarse, harder to find and more expensive (demand, supply, price... you know), so after finding and using eight of them, I decided to close the remaining walls with 18 mm thick plywood painted oak, in order to be able to leave things in the living room. Things like actual living room furniture and a stereo. I really feel "installed" in a new home once I can play some music, never mind the hundred boxes... or the missing walls. Besides, I was getting sick to have to lock all the kitchen stuff in the bedroom (the only fully closed room that allowed us to store stuff) every time we went there. Every major change happens when somebody gets sick of something, it's called a Revolution. The French invented them about two centuries ago when they got sick of being exploited by their kings! After our closing the house revolution things really changed, we could rest in the living room for smalls periods of time, when we weren't writing down what else was missing, or getting up to do something else. But as the bathroom and plumbing were being finished the living room became more of a resting and reading place. Rushing the closing of some walls also helped us realize we didn't wan't that many walls, and we switched some of the back walls for windows. (I'm told architects and constructors look pretty ugly when you do this, but I don't have any of them to worry about). In other places I've added glass bricks and turned into windows two small walls towards the lake, the only two that interrupted our full 180 degree beautiful view we enjoy. And the result is great!!
So another tip. Removing plywood boards is far easier (gross understatement) than removing railway sleepers attached with timberlocks. If you're not sure about something try it out some easy way first. We did the same with a triangular window that gives light in the back or the roof, I wasn't sure how it was going to work, so we covered with bubble film first, I seemed to work, so we turned it into an actual window afterwards.
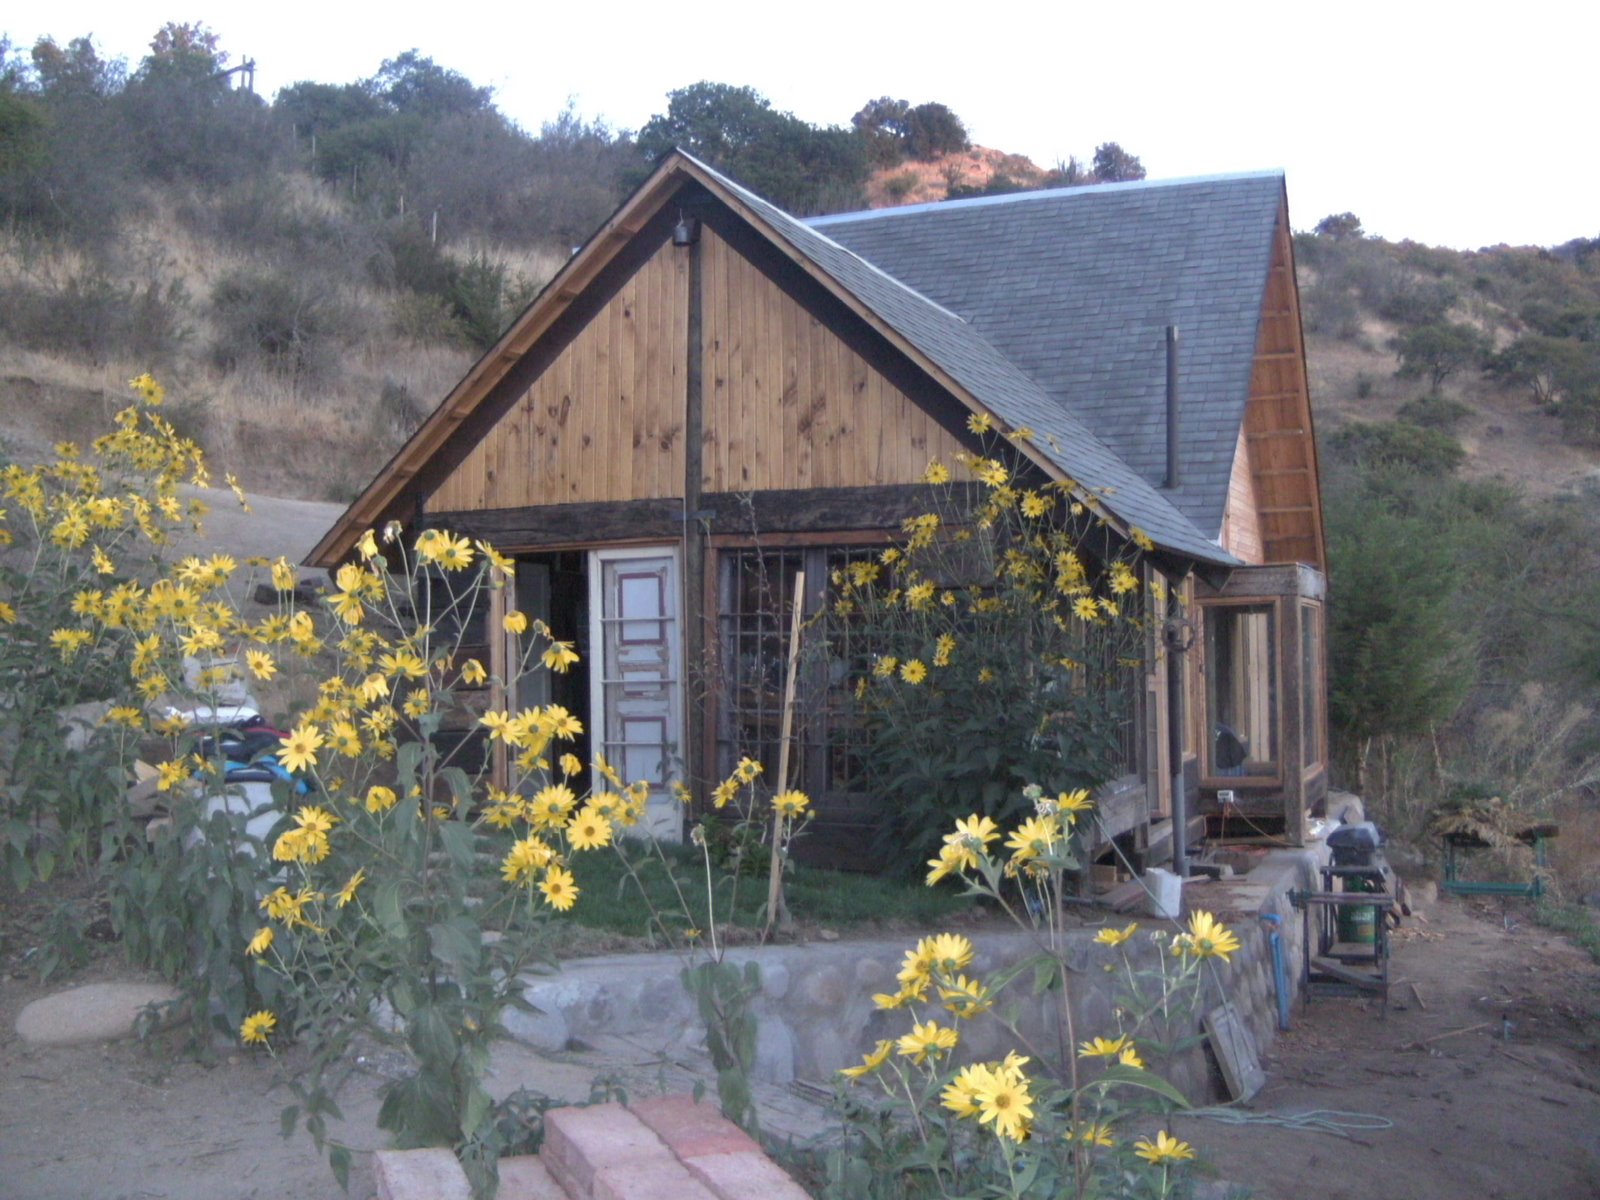
The last bits. The bathroom was done fully insulated for sound, as it's next to the living room and kitchen we didn't want unwelcome noises escaping from there. The insulation was pretty good, the bathroom is both silent and warm. We covered the outer walls in hardwood with oak stain, and have yet to find a suitable light colored wood or ceramic for the inside (2 of the walls are dark railway sleepers). The rest of the work has being adding the new electrical circuits which are done in exposed 1/2 inch copper tube over the surface in the inside and with electrical PVC tubing on the outside. We just spent the summer vacations in the house with bathroom and a fridge and what a huge difference they make. We have also installed a ceiling fan in the kitchen for a fresh breeze effect and to blow away uninvited flies. We also finished a small garden all over the front with grass and plants and fitted sprinklers. The green view all over makes a big difference. Last week we added an electric oven to the list of amenities, for frozen foods and bread baking. We are still happy as cats and birds. Stage one of our lake house is finished and since the building stopped we have been only enjoying it immensely, adding small bits for finishing on the inside. One of these days we'll start with a retaining wall on the back (before the rain starts) and then we will build the front wooden deck. But there's time now.
RailwaySleepers.com Says..
A house lovingly made from railway sleepers! A magnificent, inspirational & uplifting project that is beautifully written with passion and humour. Please keep sending the photos of your railway sleeper house as you progress! It's great to see the birth of what is an incredibly adventurous and unique project in the most breathtaking of settings. Really impressive. Many thanks for sharing your wonderful dream.